
Where Is the Best Place to Catch Dratini On Nokia C300 | Dr.fone
Where Is the Best Place to Catch Dratini On Nokia C300
Dratini is a rare Pokemon that can be found in the wild. It is a Dragon-type Pokemon that evolves into Dragonair and then into Dragonite. Dratini is a popular Pokemon among players due to its rarity and powerful evolution. If you are looking to catch Dratini on your Nokia C300, you may be wondering where the best place to find them is.
Dratini is one of the Pokémon creatures that resemble a snake. It has an elongated blue body with a blue white underside. It carries three-pronged fins on each side of its head which are white in color. Dratini also has a white bump on the forehead.
Dratini has an energy level that is constantly increasing, which makes it grow and can reach a length of more than 6 feet. It sheds its skin every time it has to grow, and usually hide behind a waterfall when shedding. The colony of Dratini lives underwater, living at the bottom feeding on food that falls from the upper levels. Outrage is the signature move for this Pokémon creature.
Part 1: What’s the evolution of Dratini?
Dratini undergoes two different evolutions
The first un-evolved version is the serpentine Dratini that looks like a snake and continues shedding its skin as it grows. When you get to level 30, Dratini evolves into Dragonair, and at level 55 it becomes Dragonite
Dragonair
This is an evolution of Dratini, which has a long scaly serpent-like body. It still retails the blue body with a white underside. The white bump on the forehead now becomes a white horn. The budding wings on the side of the head have now grown into full wings. It also carries three crystal orbs, with one on the neck and the other two on the tail.
Dragonair has the ability to stretch its wings so it can fly. It has a huge amount of energy in the body and can discharge the energy through the crystals. The energy that it releases has the ability to change the weather wherever it is. Dragonair can be found in seas and lakes.
Dragonite
This is a Pokémon character that truly resembles a dragon and is the second evolution of Dratini. It has a yellow thick body, and a couple of antennae that come out of its forehead. It has a striated underbelly. The body is quite large when compared to the small wings.
Dragonite can fly at very high speeds despite its bulky appearance. It is a kindhearted Pokémon, which is as intelligent as a human being. It has been found to have tendencies to save humans from disasters, such as saving those who have come from a capsized ship on the high seas. It lives near the sea and is extremely rare in the Pokémon world.
 Forex Robotron Basic Package
Part 2: Where can I find the Dratini nest?
Dratini is a Pokémon that lives in the water. Since it loves lakes and seas, you can find it when you visit areas that are near water. For example, in the United States, the most famous nests for Dratini are found in North Eastern San Francisco, Pier 39 and Pier 15. You will always find Dratini at these sites and they are famous for people who want to farm Dratini.
You may also g West to Squirtle Nest where you can get a lot of Dratini.
Dratini has a 5% spawning chance every day, so if you have the time, you can spend it on these sites as you enjoy the watery view and wait for it to appear.
Dratini nests can also be found in other parts of the world, such as Tokyo, Japan; Sydney and New South Wales, Australia; Paris, France and others.
Part 3: Are the Dratini nest and spawn spot in the same place?
This is quite a common question for those who are new to the Pokémon universe. Basically, Dratini nests and spawn points are the same for a period of two weeks. The nests then migrate leaving the spawn points to spawn different types of Pokémon.
If the Dratini nest migrates, it can still come back in the future. You should always keep an eye at the spawn point where you first encountered your first Dratini Nest; it may come back once more and you can continue farming Dratini.
Dratini nests will migrate on alternate Thursdays at midnight. The nest migrations are random, so make sure that you visit and hit them many times over the two weeks in order to get the most Dratini that you can.

Part 4: How to increase the possibility of earning Pokémon Go Dratini?
As mentioned earlier, Dratini can be found in certain places around the world. If you live outside these regions, you cannot be able to get Dratini. The best way to go about getting Dratini in such cases is to virtually relocate your device. This means that you can take your device to Tokyo nest sites even if you live in Africa.
The best app to use for teleportation is Dr.Fone - Virtual Location (iOS)
Features of Dr.Fone - Virtual Location (iOS)
- Instantly teleport to an area where a Dratini nest has been found and remotely collect as many as you can.
- Use the joystick feature to move around the map until you come across Dratini.
- The app allows you to seem to be walking, riding a bike, or in a vehicle, on the map. This simulates real-time travel data, which is important when playing Pokémon Go.
- Any app that relies on geo-location data can safely use Dr.Fone - Virtual Location for teleportation.
A step-by-step guide to spoof your location using Dr.Fone Virtual Location (iOS)
On the official Dr.Fone page, download and install Dr.Fone on your computer or you can click the Download button below to download it directly. Launch it and then go to the Home screen and click on “Virtual Location”.
 Jet Profiler for MySQL, Enterprise Version: Jet Profiler for MySQL is real-time query performance and diagnostics tool for the MySQL database server. Its detailed query information, graphical interface and ease of use makes this a great tool for finding performance bottlenecks in your MySQL databases.
After entering the virtual location module, connect your iOS device to your computer using an original USB cable.
Next, click on “Get Started”; you will now be able to start the spoofing process.

Looking at the map, you can now see the actual location of your device. If the coordinates are not the correct ones, go to the bottom of your computer screen and click on the “Current Virtual location” icon. This will instantly point to the current virtual location of your device.


Now go to the top side of your computer screen and click on the third icon on the bar. This instantly puts you in “teleport” mode. Now enter the coordinates of the Dratini nest that you have located. Hit the “Go” button and your device will instantly be teleported to the coordinates you entered.
The image below shows an example of coordinates entered for Rome, Italy.

Once you have successfully teleported your device, you will be able to navigate to the area where the Dratini nest has been found. You can use the joystick feature for this. You should also click on “Move here” so your location is permanently moved to that place.
You may now camp and keep hitting the Dratini nest so you can farm as many as possible within the two weeks before the nest migrates to another location.
Camping and looking for other Pokémon in the area will help you cool down and therefore avoid being banned from the game for spoofing your iOS device.

This is how your location will be viewed on the map.

This is how your location will be viewed on another iPhone device.


In conclusion
Dratini is one of the most friendly but rare Pokémon to get. It can evolve from a small serpentine worm, into a might, good-hearted dragon. This is one of the Pokémon that people love to farm for trading and taking part in raids and such events.
When you need to, you can teleport your device to an area where Dratini is popular using Dr.Fone - Virtual Location (iOS). Use the Dratini nest maps to find Dratini, and then visit the area or teleport there.
Preparation to Beat Giovani in Pokemon Go For Nokia C300
Are you ready to defeat Giovani effortlessly in Pokemon Go? Keep reading.
Giovani is the grand commander of the Team Go Rocket crime syndicate. The big boss appears stronger every month as he also changes his lineup of creatures monthly. This means your lineup of Pokemon Go Giovani counters would have to change subsequently. So how do you know the best Giovani Pokemon Go counters to use against the Team Go Rocket boss when next you meet him? Well, that’s left for this guide to answer. Here you will learn about how to defeat this monster and how to find him. Without wasting your time, let’s start with how to find Giovani in Pokemon.
Part 1. How to Find the Giovani in Pokemon
Locating Giovani’s hideout is never a walk in the park as you need to complete some daunting tasks. A detailed explanation of each task is given below:
1. A Troubling Situation Task
This four-step storyline Special Research task introduces players to the Team Go Rocket Invasion and Shadow Pokemon feature in the Pokemon Go game. Players leverage the task to learn how to stop the Team Go Rocket crime syndicate by reclaiming PokeStop and then purifying Shadow Pokemon.
How to Complete ’A Troubling Situation’ Task in Pokemon Go Giovani
Below you will find all the four steps you need to complete in the ‘A Troubling Situation’ task with their rewards:
Pokemon Go: A Troubling Situation Step 1
This step should be completed with ease since you aren’t new to the Giovani Pokemon Go game. Just evolve any two Pokemon that you own and then charge them up five times. And boom! You are done with this step.
Reward: 1,000 Stardust and 2,000 XP
Pokemon Go: A Troubling Situation Step 2
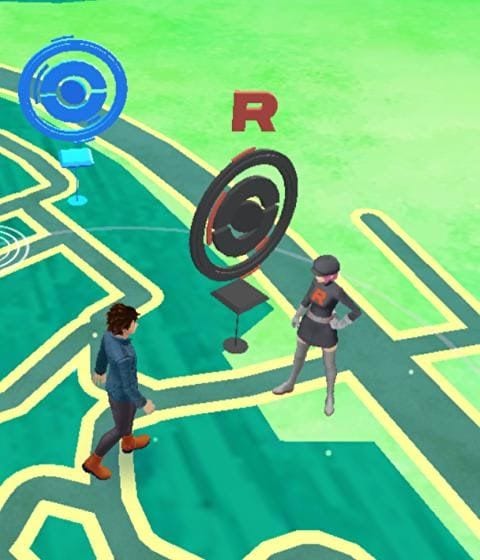
For this step, you have to catch two shadow Pokemon which can be achieved by defeating two Grunts from Team Go Rocket. On killing them, they will leave some shadow Pokemon behind which you have to catch. After that, go ahead and defeat the last Grunt to complete this step.
Reward: 2,000 Stardust, 2,000 XP, and 5 Golden Razz Berries
Pokemon Go: A Troubling Situation Step 3
After catching the shadow Pokemon in step 2, you need to catch one more to cleanse or purify the three of them. To do this, just tap on your shadow Pokemon, and then hit the Purify option. You will be charged some thousands of Stardust and a couple of candy for the shadow Pokemon.
Rewards: 2000 Stardust, 5 Silver Pinap Berries, and 1 Rare Candy
Pokemon Go: A Troubling Situation Step 4
For this step, you’ve got nothing to do. All three objectives have been automatically completed for you when you finished the previous step. You only get rewards at this final step.
Rewards: One Fast TM, One Charged TM, and 3 Rare Candies
2. Giovani Special Research Task
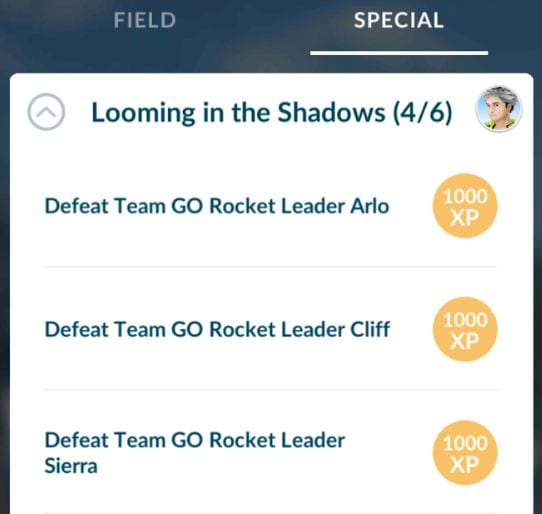
After completing the quest above, Giovani Special Research or Looming in the Shadows is the next and final quest you have to complete to face Giovani. It’s a six-step Special Research that introduces the Team Go Rocket Grunts and Leaders: Cliff, Arlo, and Sierra.

On completing one research step, you will be given a reward called the Super Rocket Radar. Like the Rocket Radar, the Super Rocket Radar can be equipped and unequipped from your Bag. This reward doesn’t only show Giovani’s hideout, it also shows some of his Grunts hideouts.
Part 2. What does the Pokemon Go Giovani Counter Contain?
Giovani remains the toughest beast amongst all the Team Go Rocket Leaders. When you find him in the game, be prepared to face his wrath. To defeat him, you need a powerful team.
The big boss choice of legendary Shadow Pokemon and second party members changes every month- the Pokemon you fought against the previous month will be different from that of the present month and thereafter.
Giovani’s lineup of creatures for October 2022 is shown below:
| Lineup of Creature | Pokemon |
|---|---|
| First | Persian |
| Second | Kangashkan, Nidoking, Garchomp |
| Third | Mewtwo |
For the Pokemon, Persian, and Kangashkan, try to have a Lucario, Conkeldurr, or Machamp in your team and you are good to defeat them.
When you encounter Nidoking or Garchomp, your team has to change. You will need to have a strong ice-type Pokemon on your team. The reason is that this new Lineup of creatures is strong on land and could cause substantial damage to the dragon-type Pokemon in case you wanna choose them.
Picking any of these great ice-type Pokemon, Mamoswine, Glaceon, or Weavile when you face Nidoking or Garchomp is a perfect choice. However, we recommend Mamoswine, because he isn’t just an ice-type Pokemon but also a strong ground-type Pokemon.
Once you defeat Team Go Rocket’s second lineup creatures, you will have to battle against the legendary psychic Pokemon, Mewtwo, who is weak to this set of Pokemon; bug, ghost, and Dark-type Pokemon. So beating this Pokemon Go Giovani grunt shouldn’t be a tedious task as you’ve got a plethora of choices when deciding the Pokemon-type to use. Origin Giratina and Tyranitar are some strong Dark-type Pokemon you can use to defeat Mewtwo.
Now you know the best Giovani Pokemon Go counters to use against each lineup of creatures, leverage it to advance to the next phase of the game where you will face the big bad boss himself, Giovani.
Part 3. Tips to Beat Giovani in Pokemon Go

Just as you did against Team Go Rocket Leaders, Arlo, Cliff, and Sierra, you need a Pokemon stronger than two of Giovani’s. With that, you can use the same Pokemon twice, thereby keeping your choice for Legendary Shadow Pokemon safe till you need it to beat Giovani.
Mind you, the big bad boss, Giovani has two Protect Shields at his disposal so you have to be careful while fighting against the monster. We implore you to start your game with a Pokemon that has a Charged move so you can charge as fast as possible.
Getting a strong Pokemon won’t come with ease, however, with the use of Dr.Fone- Virtual Location you can achieve this. The handy software is designed to help you spoof your iOS device location so you can catch any strong Pokemon of your choice remotely.
Key Features
- With just a single click you can spoof your iPhone GPS location
- The application allows you to simulate GPS movement at your comfort
- It saves your location automatically in the database
- Provides full-screen HD map view
- Easily enter your target location name, address, or the exact coordinate on the application with a joystick
Guide to Use Dr.fone Virtual Location to Get Stronger Pokemon in Giovanni Pokemon Go
Step 1: Firstly, you have to download and install a compatible version of Wondershare drfone virtual location on your PC. Wait for the installation to complete, then run the application.
Step 2: The interface above will appear on your screen. With the aid of a lightning cable, connect your iPhone to a PC, then click on the Virtual Location icon. A new interface will pop up as shown in the image below

Click on Get Started to change your location.
Step 3: Your current location will appear on the PC screen. Switch location by entering the name or address of the place in the field at the upper left corner of the application.
Step 4: The interface below will pop up on your screen. Click on the Move Here icon to teleport to your chosen location.
And now you are good to have one of the strongest Pokemon on your team when fighting against Giovani. Leverage the Dr.Fone- Virtual Location program as it will help you ease the stress of catching stronger Pokemon remotely on your device without jailbreaking it.

How to Fix Pokemon Go Route Not Working On Nokia C300?
Pokemon Go Routes has been here for quite some time now. By far, it’s still the favorite in-game feature of many trainers all around the world. The reason is pretty obvious. You can collect tons of special rewards by doing nothing complicated other than following and completing a Route nearby. On top of that, Pokemon Go Routes can also be of great help if you’re searching for new walking paths around your location. Simply put, this particular addition to the game’s already amazing roster has many real-life and virtual benefits for the players.
However, it’s perhaps safe to say that Pokemon Go Routes is still far from perfect. There have been a few complaints from users about Pokemon Go Route not working. While this issue is fairly common among the players, the root cause differs depending on the given situation. But don’t worry. If you experience similar issues, there are many tutorials you can try to fix Pokemon Go Routes not working.
In this article, we will discuss how Pokemon Go Routes basically work. We will also talk about the main reasons why Pokemon Go Routes is not showing up sometimes. Lastly, we will provide some helpful tips to fix this kind of problem. Continue reading below to learn more.
 DEX 3 RE is Easy-To-Use DJ Mixing Software for MAC and Windows Designed for Today’s Versatile DJ.
Mix from your own library of music, iTunes or use the Pulselocker subsciprtion service for in-app access to over 44 million songs. Use with over 85 supported DJ controllers or mix with a keyboard and mouse.
DEX 3 RE is everything you need without the clutter - the perfect 2-deck mixing software solution for mobile DJs or hard-core hobbiests.
PCDJ DEX 3 RE (DJ Software for Win & MAC - Product Activation For 3 Machines)
Part 1. How Do Routes in Pokemon Go Work?
The logic behind the Pokemon Go Routes is very simple. There are only two things you need to remember about it. First, you can record a walking path anywhere and submit it for review. Your Route will immediately appear on the Pokemon Go map once it receives approval from the game developer. Of course, the quality and safety of the Route must be checked thoroughly before it becomes available to the public. Another thing about the Route is that you can use it to discover and explore new walking paths near you. All you need to do is pick your preferred Route and finish the entire trail. Afterward, you can obtain special rewards and extra bonus points upon its completion.
Do you want to try Pokemon Go Routes now? Here’s a quick guide for you on how to access it on your mobile device.
- Step 1: Launch the Pokemon Go application on your smartphone.
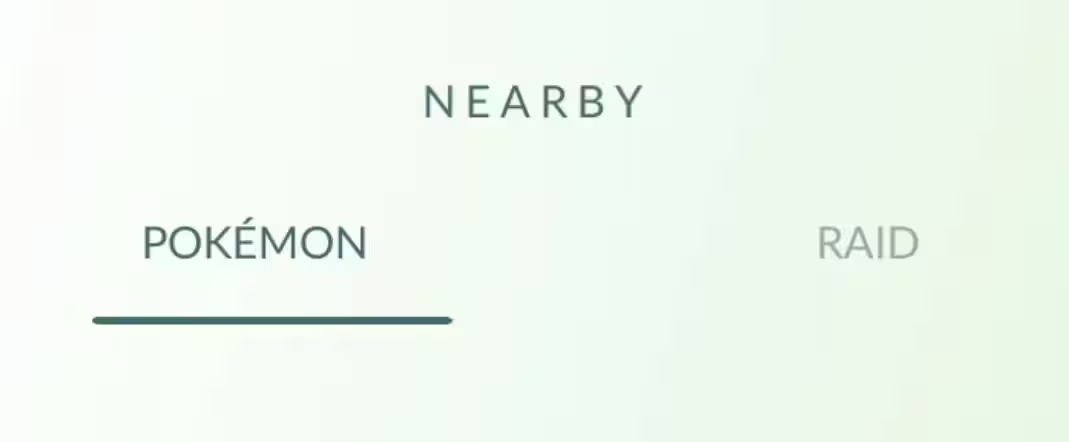
- Step 2: On the map view, find and click the Nearby icon at the bottom-right corner of your screen.

- Step 3: Then, click Route.


- Step 4: From there, decide if you wish to discover nearby Routes or create your own.
NOTE: The Create New Route feature is only available to selected Pokemon Go players. If Pokemon Go Routes is not showing up on your end, it’s probably because you’re not yet eligible.
Part 2. Why is Pokemon Go Routes Not Showing Up?
As previously mentioned, the root causes of the Pokemon Go Routes glitch vary from one trainer to another. It’s possible that the Pokemon Go Routes are not showing up because your Trainer Level is not high enough. Yes. This option is only available to players who reach the required level. However, the player’s respective rank is not always the culprit for this issue. There are other factors that might also result in the same problem. Check out the list below to understand it better.
There are no recorded Routes near your location
It’s possible that the Pokemon Routes are not showing up because you’re too far from them. Try to move around and see if the walking paths will finally appear on your radar. In this case, all you need to do is find the perfect spot where Routes are recorded.
The Pokemon Go application has no adequate location access on your smartphone

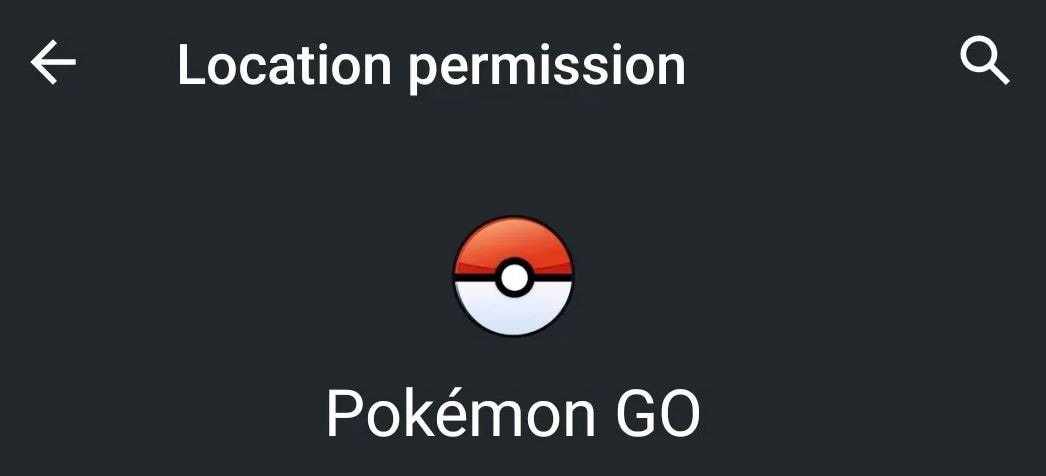
Is Pokemon Go Route not working on your end? Well, it’s possibly because the application has limited or restricted access to GPS on your smartphone. Don’t worry. It’s nothing serious. You can easily fix this kind of misconfiguration by adjusting your privacy settings.
Your internet connection is unstable while playing Pokemon Go
Pokemon Go Routes and most of the game’s main features require a reliable internet connection. If you’re connected to slow and unstable internet access, the Pokemon Go app will not load up properly. That’s probably the reason why Pokemon Go Routes are not completing or working at all on your end.
You’re using an outdated Pokemon Go app version

Keep in mind that the Pokemon Go Routes is an additional game feature. That’s why you first need to update your existing Pokemon Go app before you can access it. The Routes is definitely not available to old versions of Pokemon Go mobile software.
The current software version of your smartphone is not compatible with the Pokemon Go Routes feature
Android 6.0 and iOS 14 or higher are the main system requirements of the Pokemon Go application. The Pokemon Go Routes are not working, or perhaps the whole application malfunctions because your software version is too old. Don’t worry. A simple OS update might resolve this problem once and for all.
Part 3. Tips on How to Fix Pokemon Go Routes Not Showing Up
Is Pokemon Go Route not working on your mobile device? Don’t sweat it. There are lots of troubleshooting methods you can try to fix this issue with just the snap of a finger. Check out the list below and find the best solution that works in your current situation.
- Switch to another internet connection that is much stronger and more reliable. You cannot enjoy much of the Pokemon Go Routes features if you’re connected to faulty internet access. If Pokemon Go Routes are not showing up, it probably has something to do with your internet connectivity.
- Don’t hesitate to update your Pokemon Go application regularly. It’s one great way to maintain the functionality of the Routes and other Pokemon Go features.
- Grant the Pokemon Go app all the necessary permission on your smartphone. Make sure it has adequate access to location services and other required mobile functions.
- Try to use a newer mobile device when playing Pokemon Go. It’s possible that the Pokemon Go Route is not working because your old smartphone is not compatible with the feature.
- Visit other locations near you. Who knows? Pokemon Go Routes might finally show up when you travel to a different neighborhood.
Part 4. Wondershare Dr.Fone: The Best Alternative When Pokemon Go DeFit is Not Working
In simple terms, DeFit is a third-party application that allows trainers to play Pokemon Go without moving physically. You can walk the required distance for egg hatching or explore Routes from the comfort of your own home. However, there have been reports recently about Pokemon Go DeFit not working. Is there a substitute for this software? The short answer is absolutely yes. Wondershare Dr.Fone has a powerful Virtual Location feature that works exactly like DeFit. It can also simulate GPD movement to complete Pokemon Go Routes without going outdoors. Do you want to try it? Here’s a short guide for you.
- Step 1: Download Wondershare Dr.Fone from its official website. Right after, install it on your computer.
- Step 2: Open the newly installed software on your desktop. Once it fully loads up, connect your smartphone immediately using a data cable. Follow the on-screen instructions to establish a secure connection between the computer and your device.
- Step 3: Access the left-side panel and then click Toolbox. Navigate to the main dashboard afterward and then click Virtual Location. If it’s your first time using this feature, let Wondershare Dr.Fone download the additional resources needed.
- Step 4: After the successful download, the Virtual Location feature will then appear in a separate window. Head over to the menu bar at the top-right corner of your screen and then click One-Stop Route. The starting point for the simulation will be designated based on your current location. If you wish to change it, go back to the menu bar again and then click Teleport Mode to assign your preferred starting point. As for the destination, you can search for your desired location or tap anywhere around the map.


- Step 5: Calibrate the necessary settings according to your liking. Start by choosing your preferred type and number of trips. Right after, adjust the movement speed by moving the slider from left to write. Then, click Move Here to commence the simulation. If you wish to reset your inputs, click Clear instead.

- Step 6: The simulation will then begin immediately. Refer to the map for the real-time progress. If you wish to halt the movement for a little while, click Pause. On the one hand, click Clear if you want to start all over again.

Conclusion
Pokemon Go players must try the Routes and explore this feature. It’s indeed an incredible development that can certainly take your game experience to a whole new level. Is Pokemon Go Route not working on your end? Don’t worry. It’s not a big problem. Refer to the troubleshooting tips listed above. One of them can surely help you a lot in this regard. If you need a substitute for the Pokemon Go DeFit that’s not working on your smartphone, try Wondershare Dr.Fone. It has a potent Virtual Location feature that is capable of simulating GPS movements needed in Pokemon Go. Download it for free.
- Title: Where Is the Best Place to Catch Dratini On Nokia C300 | Dr.fone
- Author: Lary
- Created at : 2024-07-23 01:07:22
- Updated at : 2024-07-24 01:07:22
- Link: https://android-pokemon-go.techidaily.com/where-is-the-best-place-to-catch-dratini-on-nokia-c300-drfone-by-drfone-virtual-android/
- License: This work is licensed under CC BY-NC-SA 4.0.