
Preparation to Beat Giovani in Pokemon Go For Oppo Reno 10 Pro 5G | Dr.fone
Preparation to Beat Giovani in Pokemon Go For Oppo Reno 10 Pro 5G
Are you ready to defeat Giovani effortlessly in Pokemon Go? Keep reading.
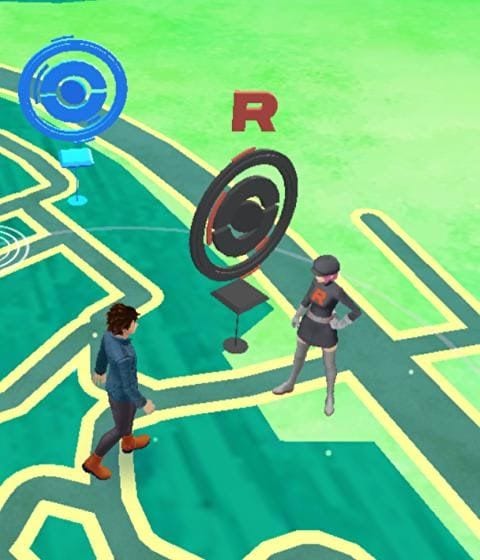
Giovani is the grand commander of the Team Go Rocket crime syndicate. The big boss appears stronger every month as he also changes his lineup of creatures monthly. This means your lineup of Pokemon Go Giovani counters would have to change subsequently. So how do you know the best Giovani Pokemon Go counters to use against the Team Go Rocket boss when next you meet him? Well, that’s left for this guide to answer. Here you will learn about how to defeat this monster and how to find him. Without wasting your time, let’s start with how to find Giovani in Pokemon.
Part 1. How to Find the Giovani in Pokemon
Locating Giovani’s hideout is never a walk in the park as you need to complete some daunting tasks. A detailed explanation of each task is given below:
1. A Troubling Situation Task
This four-step storyline Special Research task introduces players to the Team Go Rocket Invasion and Shadow Pokemon feature in the Pokemon Go game. Players leverage the task to learn how to stop the Team Go Rocket crime syndicate by reclaiming PokeStop and then purifying Shadow Pokemon.
How to Complete ’A Troubling Situation’ Task in Pokemon Go Giovani
Below you will find all the four steps you need to complete in the ‘A Troubling Situation’ task with their rewards:
Pokemon Go: A Troubling Situation Step 1
This step should be completed with ease since you aren’t new to the Giovani Pokemon Go game. Just evolve any two Pokemon that you own and then charge them up five times. And boom! You are done with this step.
Reward: 1,000 Stardust and 2,000 XP
Pokemon Go: A Troubling Situation Step 2
For this step, you have to catch two shadow Pokemon which can be achieved by defeating two Grunts from Team Go Rocket. On killing them, they will leave some shadow Pokemon behind which you have to catch. After that, go ahead and defeat the last Grunt to complete this step.
Reward: 2,000 Stardust, 2,000 XP, and 5 Golden Razz Berries
Pokemon Go: A Troubling Situation Step 3
After catching the shadow Pokemon in step 2, you need to catch one more to cleanse or purify the three of them. To do this, just tap on your shadow Pokemon, and then hit the Purify option. You will be charged some thousands of Stardust and a couple of candy for the shadow Pokemon.
Rewards: 2000 Stardust, 5 Silver Pinap Berries, and 1 Rare Candy
Pokemon Go: A Troubling Situation Step 4
For this step, you’ve got nothing to do. All three objectives have been automatically completed for you when you finished the previous step. You only get rewards at this final step.
Rewards: One Fast TM, One Charged TM, and 3 Rare Candies

2. Giovani Special Research Task
 Glarysoft File Recovery Pro - Helps to recover your lost file/data, even permanently deleted data.

After completing the quest above, Giovani Special Research or Looming in the Shadows is the next and final quest you have to complete to face Giovani. It’s a six-step Special Research that introduces the Team Go Rocket Grunts and Leaders: Cliff, Arlo, and Sierra.
On completing one research step, you will be given a reward called the Super Rocket Radar. Like the Rocket Radar, the Super Rocket Radar can be equipped and unequipped from your Bag. This reward doesn’t only show Giovani’s hideout, it also shows some of his Grunts hideouts.
Part 2. What does the Pokemon Go Giovani Counter Contain?
Giovani remains the toughest beast amongst all the Team Go Rocket Leaders. When you find him in the game, be prepared to face his wrath. To defeat him, you need a powerful team.
The big boss choice of legendary Shadow Pokemon and second party members changes every month- the Pokemon you fought against the previous month will be different from that of the present month and thereafter.
Giovani’s lineup of creatures for October 2022 is shown below:
| Lineup of Creature | Pokemon |
|---|---|
| First | Persian |
| Second | Kangashkan, Nidoking, Garchomp |
| Third | Mewtwo |
For the Pokemon, Persian, and Kangashkan, try to have a Lucario, Conkeldurr, or Machamp in your team and you are good to defeat them.
When you encounter Nidoking or Garchomp, your team has to change. You will need to have a strong ice-type Pokemon on your team. The reason is that this new Lineup of creatures is strong on land and could cause substantial damage to the dragon-type Pokemon in case you wanna choose them.
Picking any of these great ice-type Pokemon, Mamoswine, Glaceon, or Weavile when you face Nidoking or Garchomp is a perfect choice. However, we recommend Mamoswine, because he isn’t just an ice-type Pokemon but also a strong ground-type Pokemon.
Once you defeat Team Go Rocket’s second lineup creatures, you will have to battle against the legendary psychic Pokemon, Mewtwo, who is weak to this set of Pokemon; bug, ghost, and Dark-type Pokemon. So beating this Pokemon Go Giovani grunt shouldn’t be a tedious task as you’ve got a plethora of choices when deciding the Pokemon-type to use. Origin Giratina and Tyranitar are some strong Dark-type Pokemon you can use to defeat Mewtwo.
Now you know the best Giovani Pokemon Go counters to use against each lineup of creatures, leverage it to advance to the next phase of the game where you will face the big bad boss himself, Giovani.

WPS Office Premium ( File Recovery, Photo Scanning, Convert PDF)–Yearly
Part 3. Tips to Beat Giovani in Pokemon Go

Just as you did against Team Go Rocket Leaders, Arlo, Cliff, and Sierra, you need a Pokemon stronger than two of Giovani’s. With that, you can use the same Pokemon twice, thereby keeping your choice for Legendary Shadow Pokemon safe till you need it to beat Giovani.
Mind you, the big bad boss, Giovani has two Protect Shields at his disposal so you have to be careful while fighting against the monster. We implore you to start your game with a Pokemon that has a Charged move so you can charge as fast as possible.
Getting a strong Pokemon won’t come with ease, however, with the use of Dr.Fone- Virtual Location you can achieve this. The handy software is designed to help you spoof your iOS device location so you can catch any strong Pokemon of your choice remotely.
Key Features
- With just a single click you can spoof your iPhone GPS location
- The application allows you to simulate GPS movement at your comfort
- It saves your location automatically in the database
- Provides full-screen HD map view
- Easily enter your target location name, address, or the exact coordinate on the application with a joystick
Guide to Use Dr.fone Virtual Location to Get Stronger Pokemon in Giovanni Pokemon Go
Step 1: Firstly, you have to download and install a compatible version of Wondershare drfone virtual location on your PC. Wait for the installation to complete, then run the application.
Step 2: The interface above will appear on your screen. With the aid of a lightning cable, connect your iPhone to a PC, then click on the Virtual Location icon. A new interface will pop up as shown in the image below

Click on Get Started to change your location.

Step 3: Your current location will appear on the PC screen. Switch location by entering the name or address of the place in the field at the upper left corner of the application.
 Screensaver Factory, Create stunning professional screensavers within minutes. Create screensavers for yourself, for marketing or unlimited royalty-free commercial distribution. Make screensavers from images, video and swf flash, add background music and smooth sprite and transition effects. Screensaver Factory is very easy to use, and it enables you to make self-installing screensaver files and CDs for easy setup and distribution. Screensaver Factory is the most advanced software of its kind.
Step 4: The interface below will pop up on your screen. Click on the Move Here icon to teleport to your chosen location.
Parental Control Software
And now you are good to have one of the strongest Pokemon on your team when fighting against Giovani. Leverage the Dr.Fone- Virtual Location program as it will help you ease the stress of catching stronger Pokemon remotely on your device without jailbreaking it.
Pokémon Go Cooldown Chart On Oppo Reno 10 Pro 5G
Pokémon Go is a viral game; hence many people try to cheat to achieve high scores and invade others’ privacy. The good news is that the Pokémon company is very responsive to preventing and combating such attacks. Cooldown Pokémon go another such feature to deter cheating. So let us discuss what cooldown means.
What is a cooldown? Cooldown Time restricts to stop a player from repeating multiple actions at different locations in a specified period.
Part 1: What does Soft Banned & Cooldown Mean?
A soft ban is a restriction to discourage people from playing Pokémon Go while driving or moving. The three primary reasons for getting a soft ban are GPS spoofing, sharing accounts, and traveling fast. A soft ban is a temporary ban triggered when the Pokémon determines that the player cannot arrive within a period. So how do you know if you’re soft-banned Pokémon go? A soft ban has some consequences, i.e., wasting tickets, no Pokémon guarding towers, no attacking Pokémon defending towers, etc.
What does cool down mean? Cooldown is the time a player has to wait after completing the in-game action. It is calculated from the distance you travel between the triggering activities. It depends on distance travel, and the time for cooldown is also high when the distance is high.
 PaperScan Professional: PaperScan Scanner Software is a powerful TWAIN & WIA scanning application centered on one idea: making document acquisition an unparalleled easy task for anyone.
Part 2: What Happens When You Get a Soft Ban?
When you get a soft ban, its duration is about 12 hours. In this period, any Pokémon you catch during the ban period will leave even if you use any ball type or berries. It also restricts you from winning gym fights and looting Pokéstops. You can still keep playing Pokémon, though, as it is the most lenient form of ban.
Part 3: Cooldown Rules and How to Avoid Soft Ban in Pokémon Go?
1. How long does it take for a Pokémon to Cool Down?
The cooldown time is proportional to the distance covered by the player. So, when you perform an action marking our location, the cooldown time starts, and you must wait until the cooldown time is over. Here is a quick review of how long the cooldown you can expect.
| Total Distance Covered | Cooldown Period |
|---|---|
| 1 km | 30 seconds |
| 5 km | 2 minutes |
| 10 km | 6 minutes |
| 25 km | 11 minutes |
| 30 km | 14 minutes |
| 65 km | 22 minutes |
| 81 km | 25 minutes |
| 100 km | 35 minutes |
| 250 km | 45 minutes |
| 500 km | 1 hour |
| 750 km | 1 hour 20 minutes |
| 1000 km | 1 hour 30 minutes |
| >1500 km | 2 hour |
2. How long must I wait to avoid a softban?
The waiting period for a soft ban is around 12 hours. After this time, if you can try and catch a Pokémon, it means the soft ban is over.
3. Actions that Do trigger cooldown?
The main reasons for a soft ban are GPS spoofing, changing your location to a distant place in a short time, and traveling too fast to combat playing while driving. Sharing accounts is another reason.
So, what action of a player can trigger a cooldown? Let us list them here for quick reference.
- If you catch a wild Pokémon, like the ones coming from Incense, Meltan’s Mystery Box،, Lure Modules, and Special Lures.
- Another trigger of the cooldown is dropping the ball on the encounter screen.
- When you feed a wild Pokémon a berry.
- When you feed a gym defender on a screen radar.
- Gym battles.
- When a Pokémon flees, if you try to catch it.
4. Actions that DO NOT trigger cooldown?
On the other hand, some actions that do not trigger a cooldown in Pokémon Go;
- We are encountering a wild Pokémon.
- Feeding a berry to a gym defender remotely.
- Teleporting
- Auto Walking
- Eggs hatching
- Exchanging gifts.
- Pokémon evolution.
- Catching reward Pokémon from quests
- Speed raids but only after a 2-hour Cooldown
- Trading a Pokémon
- Transferring a Pokémon
- Buddy changing
- Using Candies and Stardust to get a second move for a Pokémon
- Incense, Lucky Egg or Starpiece
- Player vs. Player or team leader battles
- Buying a Lure Module or Special Lure at a PokéStop
- Buying coins and shop items
- Pokémon power up
- Speed raids without a 2-hour Cooldown
- Claiming rewards
- Changing your avatar’s clothes or items
- Clicking on a gym with an active raid to get a free raid pass
- Finding and catching certain Pokémon from s Smeargle and Party Hat Pikachu
- Dropping a ball
 LYRX is an easy-to-use karaoke software with the professional features karaoke hosts need to perform with precision. LYRX is karaoke show hosting software that supports all standard karaoke file types as well as HD video formats, and it’s truly fun to use.
5. What happens if you break the cooldown of Pokémon Go?
When you break the cooldown Pokémon go, you are bound to face a soft ban. How do you know if you’re soft-banned Pokémon go? If you attempt to take any action in the game and receive a “Try Again Later” error message, it means you are soft banned.
Part 4: The Safest Way to Teleport in Pokémon GO Without Getting Banned?
As we already discussed, teleport does not trigger soft ban or cooldown restrictions. So, it is a valid method of moving on without any risks. While location spoofers and using VPNs can be risky, and you may get banned and lose your records, we recommend using a safe application that is Dr.Fone Virtual location, to elevate your game and fun.
Dr. Fone allows you to teleport anywhere in the world along with other unique features, including route simulation, GPS control, and unlimited choices of locations. Also, the new location gets active right away in the game.
It is a very simple-to-use application and provides robust results if you follow the guidelines. You have to make sure that the following best practices are followed, including;
- Always wait for the cooldown period to be over so that the game does not flag your account because of very fast movement and change of location. We have discussed the optimal cooldown time in the above section.
- Always log off from Pokémon before teleporting so the game does not detect your actions. For logging out, go to settings in your game by clicking the Pokeball in the center of the screen. Scroll down to locate and click the logout button.
Dr.Fone - Virtual Location (iOS/Android) is an easy and reliable teleporting method for Android and iOS. So let us visit how to teleport using this software step by step.
Part 5: How to Teleport in Pokémon Go Using Dr. Fone - Virtual Location
Looking for a Pokémon Go Spoofer that’s still working? Or thinking about how to teleport in Pokémon Go safely? Meet Dr.Fone - Virtual Location! This powerful GPS location spoofing software lets you use a fake location without risking a ban. No jailbreak is required. Unlock the Pokémon Go map in restricted areas, and enjoy keyboard and joystick modes for seamless movement.
Step 1: Launch the Dr.Fone app and open the “Virtual Location” feature.
Connect your phone to the system and click on the “Get Started” button to start the process.
Step 2: Select a location to teleport
In the new screen, navigate to the teleport option on the menu in the top-right corner and click the button to launch it.

Now, you can choose the location by entering its name in the search bar or coordinates if you want to be more precise. Then, you can see the desired location on the map on the screen.
Step 3: Teleport your location on Pokémon Go
When you reach the target location and move your pin, click the “Move Here” button.

Voila! You have teleported your location to the desired place.

When you want to stop this teleporting, simply click the “Stop Simulation” button and your real location will take effect.

Conclusion
Pokémon Go is a viral and fantastic game. However, sometimes players get into trouble trying to beat its restriction or break the cooldown of Pokémon go and even compromise their phone’s security and game records. Teleporting using Dr.Fone - Virtual Location application is a simple and effective method of excelling in the game and avoiding bans while enjoying the perks of fast movements. We highly recommend using reliable applications to keep your phone and game secure.
Detailed guide of ispoofer for pogo installation On Oppo Reno 10 Pro 5G
Pokemon Go is Niantic’s most successful game that has taken the world by storm. Players get to be a part of the various regions of the Pokemon has now become one with our world. The game requires you to travel to different locations to complete researches, catch Pokemon, defend gyms, and most importantly, complete the Pokedex given by Professor Willow. Niantic’s games are designed to be played with others outdoors. This feature ends up giving players in some parts of the world advantage over others. This is specially to catch regional Pokemon and during ticketed events and sponsored events. Spoofers can avoid the barriers of distance and play anywhere in the world by iSpoofer for pogo installation and other such apps. Niantic, however, does not allow this and considers it the same as hacking. Players who were looking to play and access all the features of the game available all across the world.
Part 1: Will the iSpoofer back on 2020?
iSpoofer has been shut down. All its applications, websites, and other related services have been terminated. iSpoofer for pogo installation does not exist. If any website claims to give access to the application or iSpoofer direct download, it is fake. Also, the new Pokemon Go application version which is 0.195.0 has been updated to detect applications like iSpoofer, so on being detected, it may lead to a warning, or a permanent ban as well. And we don’t see the certainty to get it back soon.
Part 2: Detailed guide of iSpoofer for pogo installation
This detailed guide for iSpoofer installation is for those who still possess the older version of the app that works in an older iOS version.
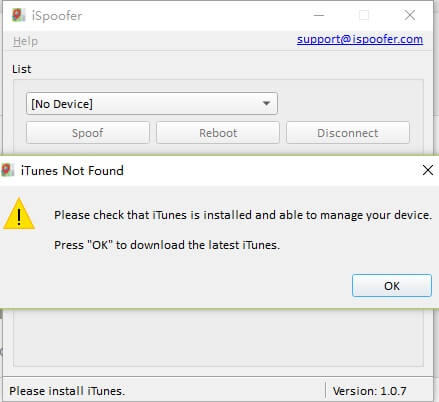
Step 1 – Install the setup for iSpoofer on your computer if you had got it using. This requires the latest version of iTunes, so make sure that you have it installed.
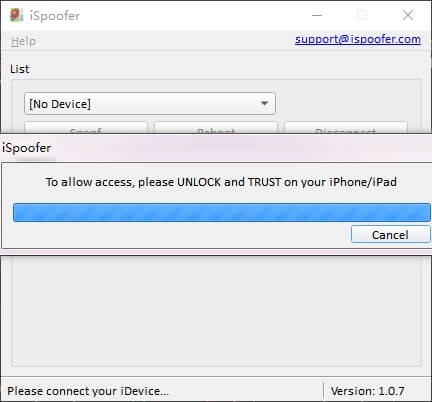
Step 2 – Once the setup is done, connect your phone to the computer and unlock it. You will have to select the “TRUST” option for the software to do its work. On selecting this option, iSpoofer will download a developer file that will spoof the location.
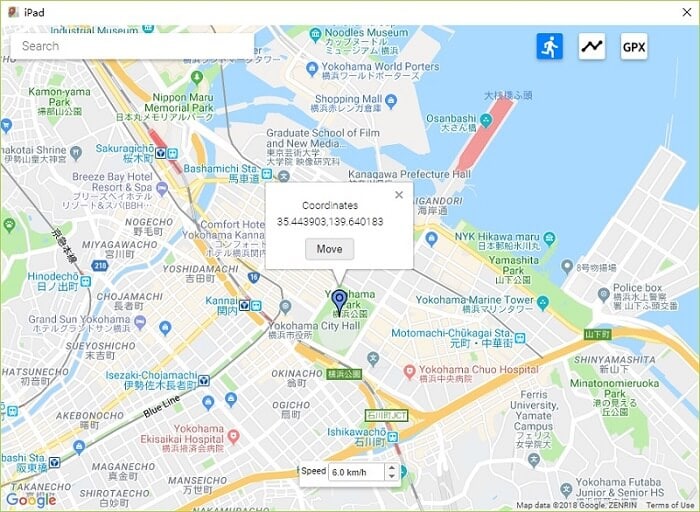
Step 3 – A map will load on your computer screen, which allows you to enter or point the location. Enter the location of your choice and click on “MOVE”. And that is it! Three simple steps and you have spoofed!
Part 3: How to use the iSpoofer when you play pokemon
Follow the tutorial above for ispoofer for pogo installation. A mock location has now been added to your device that makes iOS believe that you are at the entered spot.
 Power Tools add-on for Google Sheets, 12-month subscription

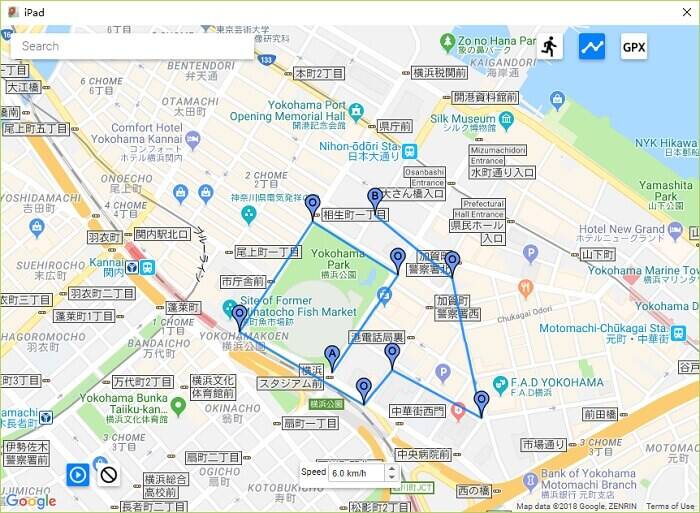
Following these steps, disconnect your phone and launch Pokemon Go. From here you can either use the joystick to move around or use a “.gpx” file to add a preset route for you to move around. That would look like this -
iSpoofer for pogo installation has the following disadvantages -
- The application cannot work without iTunes and is very dependent on it.
- Niantic can easily detect spoofing through this app and may lead to a ban.
- Movement simulations are hard and unnatural, making it more susceptible to a ban.
- Configurations and settings require some technical knowledge in to troubleshoot any errors.
- The app is prone to crashing a lot. The interface sometimes cannot handle the constant change of locations.
All these issues are overcome with great detail by Dr. Fone Virtual Location (iOS) by Wondershare.
Part 4: Safer tool to spoof pokemon- drfone virtual location
Pokemon Go Spoofers using iOS need not depend on iSpoofer for jumping locations. Dr. Fone Virtual Location by Wondershare is the new, safer app to spoof in Pokemon Go. The app uses mock location services to help you teleport to anywhere across the world. This also allows you to be safe from the detection software in Pokemon Go.

What are the benefits of using Dr. Fone Virtual Location?
- It provides a mock location and location changer – With just a single click, the application can change your location to where you want to. All apps on your phone will start recognizing this location.
- It enables you to move at different speeds - It has 3 different speeds, namely walking, cycling, and driving that helps you travel faster or log in kilometers too.
- The joystick allows movement – You can use the joystick to move your character around the map to navigate to Pokestops or rare wild spawns easily.
- The map view gives a 360o view – By scrolling around the screen, you can get to see all the routes around you and plan accordingly.
- Auto-walk feature - The game has an auto-walk feature in case you do not want to use the joystick to move around manually.
- Keyboard movement commands – The player can also use the A, S, W and D keys on the keyboard to move around
Step by Step Guide to Install and use Dr. Fone Virtual Location -
Step 1 - Download the Dr. Fone Virtual Location by official Wondershare website. Connect your phone to the computer in to execute the changes. Click on the “Virtual Location” option.
Step 2 – Now, on the next screen, you will see “Get Started” option. Click on it to proceed.
Step 3 – The screen will now show a map with your current location on it. In case the location is incorrect, click on the “Center On” button at the bottom-right side of your screen.
Step 4 – Select the “teleport” option by clicking on the icon on the top right corner. Then, in the text box, enter the city or the location’s exact name or the coordinates in the “latitude, longitude” format.
Step 5 – After entering your location, select the “GO” option.
Step 6 – The app will show you an option that says “Move Here”. Click on it, and now you have successfully spoofed to your location of choice.
Your spoofed location is now the default location of your phone, and all the apps will recognize it. The maps app on your phone looks like this –
The teleportation is now complete. Enjoy playing the game with no lags or errors.

Alert
While spoofing between two distant locations give the required amount of time for the cooldown timer to reach zero. If you decide to spoof too quickly, you will automatically trigger a soft ban, and you will not be able to play most parts of the game like catching Pokemon or spinning Pokestops. If this occurs consistently over multiple occasions, it will trigger Niantic’s warning and may end up getting a permanent ban. It has a 3-strike policy. 3 warnings are given before the account is permanently deleted.
The notice looks like this -


The cool-down period between two locations is based on distance and you can refer to the table below to understand the time you need to wait before logging in again.
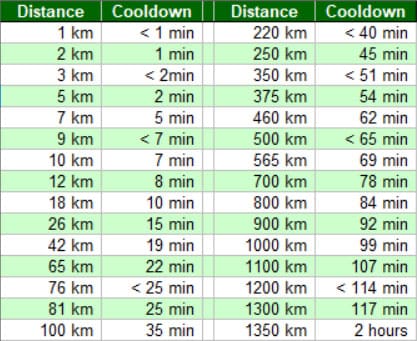
Most gamers wait for the standard 2 hours before logging in again. This gives them access to all the game’s features like before.
Conclusion
We hope that this article has been informative, about Dr Fone Virtual Location and ispoofer for pogo installation. You can now spoof locations with ease by using Dr.Fone - Virtual Location app. Vigilance is needed, and spoofing must be done by following all rules of cool down. This would prevent you from being caught by Niantic, and by Officer Jenny. We would like you to enjoy the game throughout without having to lose any of your levels and Pokemon.
- Title: Preparation to Beat Giovani in Pokemon Go For Oppo Reno 10 Pro 5G | Dr.fone
- Author: Lary
- Created at : 2024-07-23 02:36:33
- Updated at : 2024-07-24 02:36:33
- Link: https://android-pokemon-go.techidaily.com/preparation-to-beat-giovani-in-pokemon-go-for-oppo-reno-10-pro-5g-drfone-by-drfone-virtual-android/
- License: This work is licensed under CC BY-NC-SA 4.0.