
Pokemon Go Error 12 Failed to Detect Location On Nokia C12 Plus? | Dr.fone
Pokemon Go Error 12 Failed to Detect Location On Nokia C12 Plus?
Pokemon Go is a popular game that has taken the world by storm. It is an augmented reality game that allows players to catch Pokemon in the real world using their smartphones. However, many players have reported encountering the “Failed to detect location (12)” error while playing the game. This error can be frustrating as it prevents players from playing the game properly. In this article, we will discuss what causes the “Failed to detect location (12)” error in Pokemon Go and how you can fix it on your Nokia C12 Plus.
Pokémon Go has been on the nerves of its players and this is all because of the AR notion that it presents. The failed to detect location 12 is one of the most common errors that are faced by the players while playing this game. You might not believe but the GPS signals and the location settings on iPhone or Android are the two main reasons for this error. It can be resolved with ease and this article has been written to get the work done with ease. Applying the methods explained will ensure that you get the best results overall.
Part 1: Why is Location Important in Pokémon Go?
The best part of this game is that it has been compiled keeping in view the location mechanics. The location analytics of the game has made sure that it becomes the overnight sensation. Three main attributes are associated with the location framework of the game. These attributes also show how important the location is for the game. Understanding these attributes will also make sure that the user can overcome the errors such as failed to detect location 12 GPS joystick 2019.
i. Physical World Attribute
The best part of this attribute is that it is the center of the user experience of the game. The second part is the fact that this map has evolved and there are no shortcuts to its success. Ingress was the previous game that was developed by Niantic and the crowdsourcing of this map started with the evolution of this application. This was developed by the same team that is working on the core of Google Earth.
ii. Real World Gestures
The augmented reality is another important aspect that is related to Pokemon Go and this also means that the location services are relied on when it comes to this application. The android and the iOS location services are continuously used by the game to provide the pinpoint locations as well as the game features that are not found in other applications. The use of location through GPS satellites even becomes more important for such gestures. Especially when the player is outdoors it becomes too important to deal with using GPS location.
iii. Place Attribution
The system within the system that has been designed by the game developers makes sure that the location inaccuracies are accounted for. This also means that the 4-meter accuracy of the GPS is further enhanced to deal with the perfect location identification of each player.
Part 2: Ways to Fix Error 12 on Pokémon Go
Several ways can be used to make sure that the subject error is resolved with ease. This section of the article will deal with all such ways that can be used to get the work done with ease and perfection.
Method 1: Enable Mock Locations
As the name suggests it is to set the fake location using the build-in iPhone feature. It will also make sure that the feature of the game continues to work perfectly.
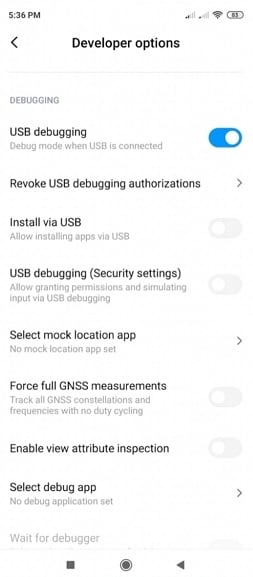
Step 1. Go to the developer options of your device. To get to the developer options simply head over to the settings > About Phone > Software Info > Build number and tap it 7 times to enable the mock locations.
Step 2. Install the Fake GPS that is a free application and can easily be found on the Play Store.

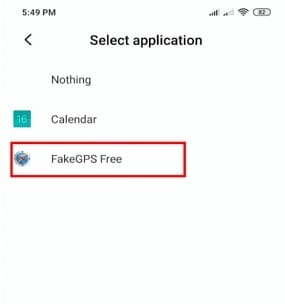
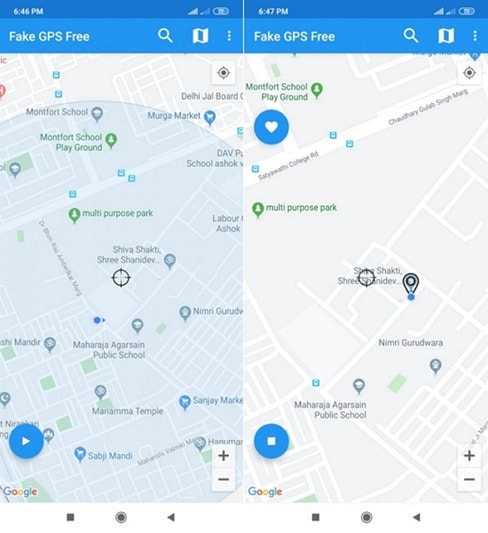
Step 3. Launch the application and you can easily enjoy Pokémon Go without any hassle and trouble and resolve the Pokémon go failed to detect location 12 fake GPS error.
Method 2: Location Activation
This is another important and easy way to make sure that the Pokémon failed to detect location 12 error is resolved with ease and perfection. To execute the process the steps are mentioned as follows:
Step 1. Open the settings on your Phone to start with:
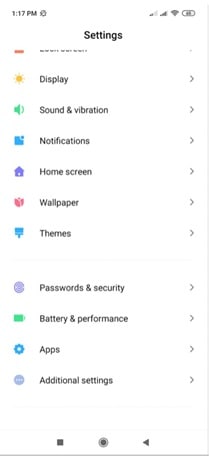
Step 2. Tap on the passwords and security to proceed with the process:
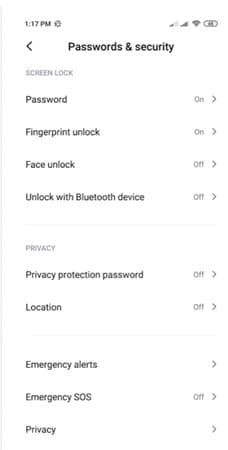
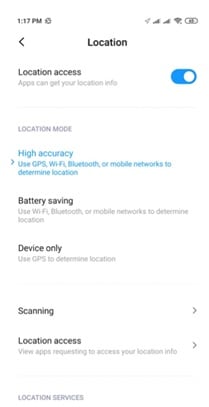
Step 3. Tap to turn on the location to finish the process and eliminate the failed to detect location 12 Pokémon Go errors.


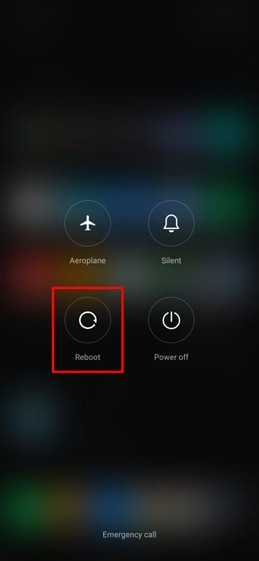
Method 3: Reboot the Nokia C12 Plus device
This might seems weird but this trick has been working to quiet some time now and has been proven to eliminate the failed location 12 Pokémon Go issue. There is a possibility that the server location is not synced with the Nokia C12 Plus device. Restarting the Nokia C12 Plus device will make sure that both the locations are sync and the problem is resolved with ease.
Just long-press the power button and choose the reboot option from the menu that appears to complete the process in full.
Part 3: Best Way to Overcome Location Error 12 on Pokémon Go for iOS Devices
Dr. Fone Virtual location is the best tool to overcome issues such as failure to detect location 12 Pokémon go on iPhone. The program has been designed to make sure that the GPS location is spoofed and you get the perfect outcome in resolving the error under discussion.
The Process
Step 1: Program Installation
To begin the process, download and install the program to get going with the process.

Step 2: Enable Virtual Location
Connect your iPhone and enable virtual location from the options of the program. Hit get started to begin the spoof.

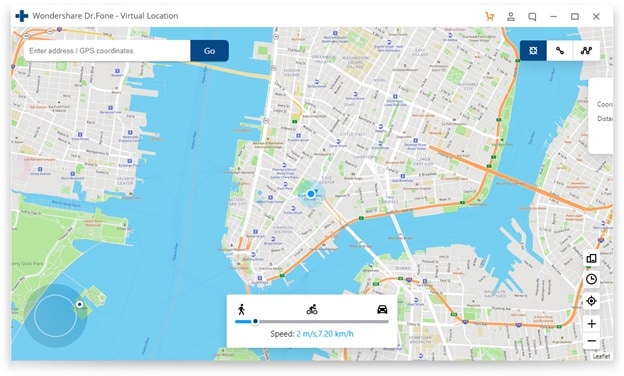
Step 3: Locate yourself
The center on the button on the next screen is to be clicked to get the accurate location.

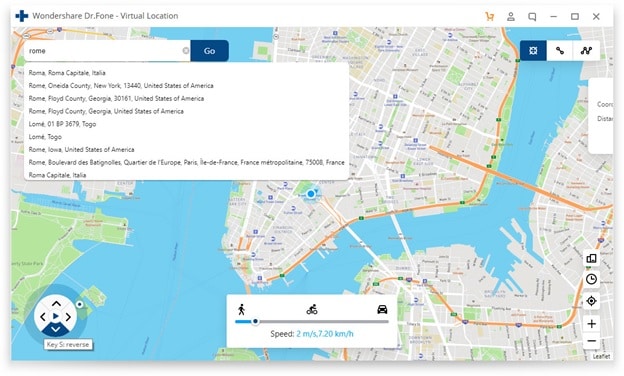
Step 4: Teleportation
On the upper right corner click the icon on the third to begin teleportation or spoofing to be precise. Enter the name of the place where you want to teleport to.


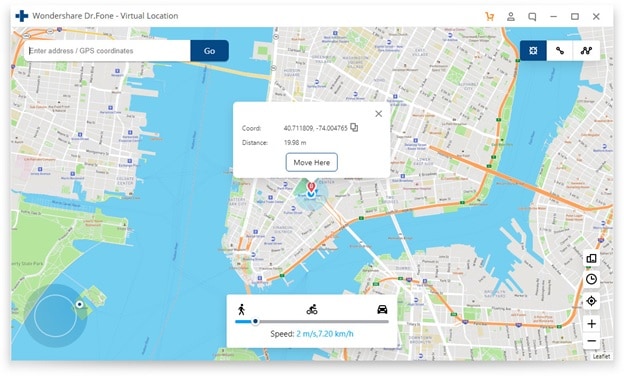
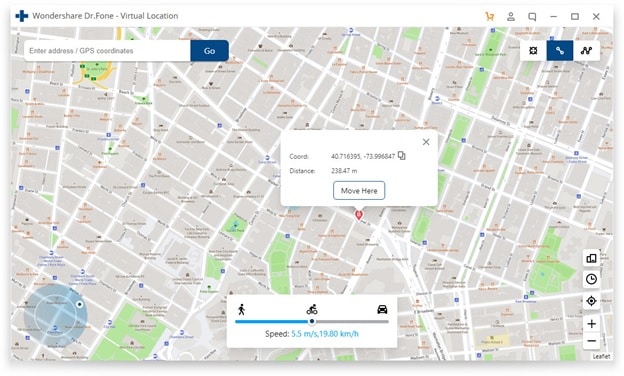
Step 5: Move to the teleported location
Click on move here and the system will move you to the location that has been entered.

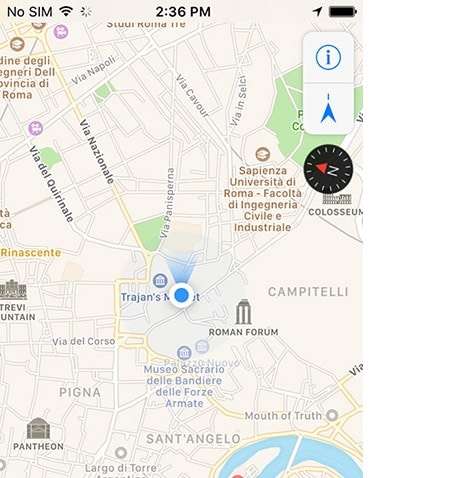
Step 6: Validate and Completion
The location will be locked by the program and your iPhone will also show the same location as on Dr. Fone. This also completes the process in full:
Conclusion
Dr.Fone - Virtual Location is the best and the state-of-the-art program to overcome Pokémon go unable to detect location 12 on iOS devices. It has an intuitive interface and it also allows the users to overcome the issues that traditional spoofing programs present. It is being updated constantly which also means that you will be able to get the best results. There is no program on the internet that can resolve the error that failed to detect location 12 in Pokémon go as easily as this one does.
All You Need To Know About Mega Greninja For Nokia C12 Plus
Are you a fan of Pokemon Go? Then, you will find this article not only useful but also quite interesting. In case you have never played this game before, then you should know that Pokemon Go is a fantastic augmented reality game.
It requires the use of GPS (Global Positioning System) to track your location. Basically, Pokemon Go is a mobile application which you can easily download from Google Play Store or App Store, and it’s absolutely free. In simple words, you can say that Pokemon Go makes use of mapping technology so as to plot your actual location as you roam around in the streets to catch your favourite Pokemon.
When you play the game, your main goal would be to catch as many Pokemon or fictional characters as you can. Your main task will be to battle your opponents to catch the Pokemon and then train them.
It’s worth mentioning here that this AR-game is absolutely convenient to play. Now, one of the most amazing features that have been added to this game is Mega Evolution. But, unfortunately if you were of the opinion that greninja can mega evolve, then you are completely wrong, in fact you should note that no Kalos pokemon can mega evolve.
Through this article, we will discuss all you need to know about Greninja. So, without any further delay, let’s get started.
 vMix Basic HD - Software based live production. vMix Basic HD includes 4 inputs, 3 cameras, streaming, recording, playlist.
Part 1: Who is Mega greninja?
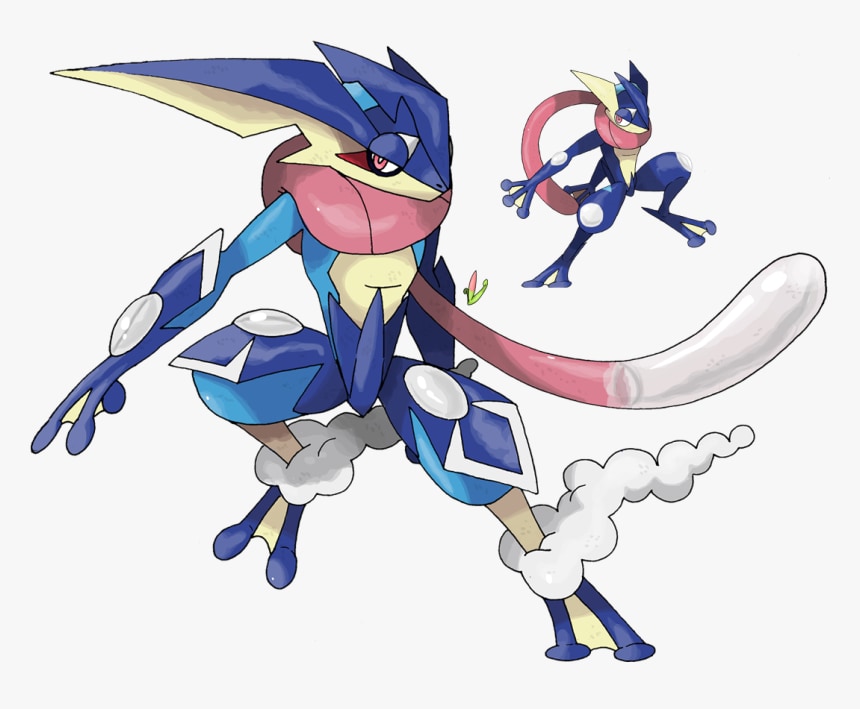
Also, called the Ninja Pokemon, Greninja is Dark/ Water-type pokemon. Some people love to call it a frog-like master. One of the most amazing features of Greninja pokemon is that with its swift movements, you will notice that this pokemon succeeds in confusing its opponents.
It makes use of very sharp throwing stars to slice its enemies. It features Torrent ability.
There are various weaknesses of this pokemon which include “Fighting”, “Grass”, “Electric”, “Bug”, and “Fairy”.Its worth mentioning here that Greninja pokemon is the final evolution of Froakie.
Part 2: What are the Strengths of Greninja in Pokemon?

Greninja is resistant to “Water”, “Fire”, “Ice”, “Dark”, “Steel” and finally “Ghost”. Also, this pokemon is immune to “Psychic”. This pokemon’s presence can be very intimidating for its opponents, it would not be wrong if we say that Greninja is quite unpredictable. There is no doubt that the counter attacks of Greniaja prove to be very dangerous for its enemies.

Part 3: How to Catch Greninja?
In order to catch Greninja, you will be required to fulfill specific requirements in the Pokemon Sun and Moon Exclusive demo.
First of all, after launching the Pokemon Sun and Moon Demo, go to the Pokemon Center.
Then, you’ll meet Professor Kukui and when he starts talking to you and asks what you wish to do , choose the option of “bring to full version.After that, you will be required to choose Ash-Greninja. Then, open the full game, finally you have to enter the nearest Pokémon Center.
Catching your favourite Pokemon or to mega evolve a specific pokemon will require you to go to different places or explore different locations, but it’s not always possible to step out of your house, it might be raining, or its night time, in the case, we recommend using software called Dr.Fone(Virtual Location).
With the help of this amazing software, you can teleport to any location or place in the whole without even requiring you to step out of your house.
In order to get started with Dr.Fone, you need to download Dr.Fone(Virtual Location) iOS. Then, you have to install Dr.fone on your smartphone. Finally, you have to launch Dr.Fone (Virtual Location) on your device.
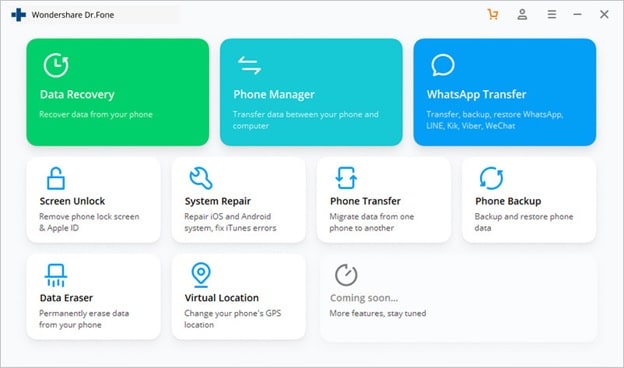
Step 1: You have to tap on “Virtual Location” among the various options that you will notice therein. It’s important to ensure that when you are setting up Dr.Fone on your device, always ensure that your iPhone is connected to the PC. Then, click on “Get Started”.
 The Tube Sites Submitter is a fast and efficient tool for anyone who needs to upload videos quickly, easily and automatically to hundreds of tube sites in mere minutes .
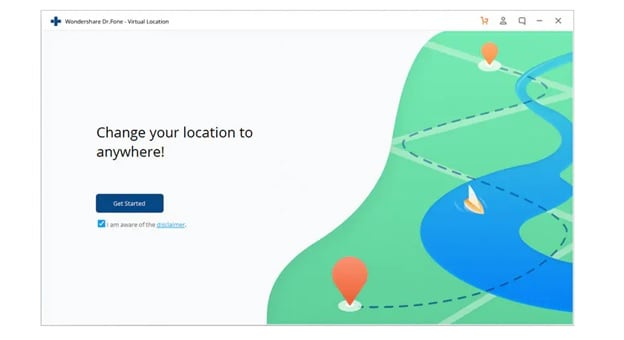
Step 2: If you have executed the prior steps or directions successfully, then you will see a new window that shows your actual location on a map will get displayed on your screen. Now, make sure that your displayed location on moa is accurate, if not, then click on “Center On,” with the help of this, you’ll be able to make your location correct.
Step 3: After all the previous steps, the next step is to click on the “teleport mode” icon, which will be located in the upper-right part. This will activate the teleport mode. After that, you have to enter the name of the location or place where you wish to teleport to in the upper left field. Finally, tap on “Go”. As an example, we are going to enter “Italy”, Rome in the left field.
Step 4: In this manner, your location will now be understood or set by the system to “Italy”. You’ll see a pop-up box; you have to just click on “Move On”.
Step 5: If you have followed the directions accurately, your actual location on the map will now be set to “Italy”. You can confirm your location from the Pokemon Go’s map. Finally, below we have provided a screenshot of how the location will be shown.
Step 6: Also, you’ll see that the location on your iPhone would have also changed now to “Italy” or any other place that you have entered earlier.
Conclusion
So, we have reached the end of this article. We hope that you found the article quite useful as well as insightful. We also hope that with the help of the setup guide for Dr.Fone you can now easily catch your favourite pokemon by teleporting to different locations across the world. If you have any doubts or suggestions related to this article, then feel free to write it down in the comment section. So, this was all from our side for now. Stay Tuned
 PCDJ Karaoki is the complete professional karaoke software designed for KJs and karaoke venues. Karaoki includes an advanced automatic singer rotation list with singer history, key control, news ticker, next singers screen, a song book exporter and printer, a jukebox background music player and many other features designed so you can host karaoke shows faster and easier!
Ways to trade pokemon go from far away On Nokia C12 Plus?
If you’re a regular Pokemon go player then the title of this article would have truly intrigued you. Pokemon go is one of the most exciting and interesting virtual reality games which has been doing rounds in the gamers community. The game needs you to go around from place to place. One cannot play the game indoors. Trading in Pokemon go is one of the essential features. However, according to Pokemon go trading rules, a player needs to travel around. However, there are some extremely useful hacks using which you needn’t travel around for Pokemon go trading. You can do it remotely all by sitting at your home!
Part 1: Trade pokemon go from far away
One of the most convenient ways for Pokemon go trading without having to travel is by using some virtual location servers just like discord servers. Next, you need to make friends with other Pokemon go players who stay in far-off places. Remember, that these friends must be on your virtual location server. Only then, you can do Pokemon go trading with them. Hence, make sure to have your friends on your server. One of the most popular and easy-to-use virtual location servers is the Dr.Fone - Virtual Location. Using this you can shift your location to any location in the world. Dr. Fone is highly user-friendly and can easily change your location, let us learn to use the Dr.Fone - Virtual Location , shall we?
How to use Dr.Fone - Virtual Location to teleport to any location
Dr.Fone - Virtual Location, easy-to-use software that will enable you to set any arbitrary location according to your choice. Suppose, you have a friend in London and you want to trade pokemon with him, you can simply change your location to London and then trade pokemon easily! It’s that simple to use!
- Tweak your location: Using Dr.Fone - Virtual Location, you can change your location very easily. You can use this feature while playing virtual reality games and also to stay undercover from nosy relatives.
- Set the speed to mock GPS location: While playing virtual reality location-based games, you can also set the pace of movement of your GPS. This will help you to become better at the game!
- Joystick simulated motion: you can use the in-app joystick for simulating motion and moving around on the map.
Step-by-step Tutorial
Step 1: Launch the Tool
Firstly you need to install the Dr.Fone - Virtual Location setter on your phone. Now on the interface click on “Virtual Location” from the options that you’d see on your screen. Then click on “get started”
Step 2: Connect Device
Now, you need to take your iPhone’s cable and use it to connect your Nokia C12 Plus to the PC. Wait until the program detects it. Maybe you need to trust the PC if you are plugging the Nokia C12 Plus device for the first time.
Step 3: See your Location
Now on the interface, you’d see a map with your location highlighted on it. If your location is incorrectly displayed then click on the “center on” option. Now the location displayed would be accurate.
Step 4: Activate Teleport Mode
Subsequently, activate the “teleport mode” by clicking the icon shown in the image. Now enter the location to which you want your fake location to be set to in the upper left field. Now click on “go”

Step 5: Change Location
Upon clicking on “go”, a pop-up will appear showing you the distance of the location you have chosen. Tap on “Move Here” and the location would now be set to the location entered by you. Click on “center on” to check your location.
Part 2: Which pokemon can you evolve with trading?
Evolution is one of the most important aspects of the game Pokemon go. You can evolve several pokemons just by trading them. There are several pokemon that you can evolve using trading. Given below is the list of the different pokemon that can benefit from evolution.
- Kadabra
- Machoke
- Graveler
- Haunter
- Boldore
- Gurdurr
- Karrablast
- Shelmet
However, trading Pokemons in Pokemon go could be slightly tricky without having at least one close friend in the games who is also of a considerable level. Only then, you will be able to evolve your pokemon by trading.
Part 3: How to do the special trade?
You need a Special Trade whenever you wish to trade a legendary Pokemon or a shiny Pokemon in Pokemon Go. These pokemon are very rare to find and hence you won’t want to trade these rare Pokemons very often, however, you can trade a rare Pokemon only once per day. To trade a rare Pokemon would also need to be a Great or Best friend, two of the highest levels of friendship in the game Pokemon go. To increase your friendship level you need to battle and trade more and more. It’ll take quite a bit of time to reach that stature of a friendship level. This could cost as much as one million, this amount will however decrease with increasing friendship levels.

Final Words
Trading in Pokemon go was introduced in recent times and had now become one of the most integral factors of the game. Pokemon go trading has changed the gaming trend. However, you could get an upper hand by using a virtual location changer such as Dr.Fone - Virtual Location . This can help you to even trade pokemons seamlessly with friends staying at far-off places. Using the pokemon trade feature and evolving pokemons is a smart and handy way to progress further in the game. As a Pokemon go player, you must try it out!
- Title: Pokemon Go Error 12 Failed to Detect Location On Nokia C12 Plus? | Dr.fone
- Author: Lary
- Created at : 2024-07-23 01:02:04
- Updated at : 2024-07-24 01:02:04
- Link: https://android-pokemon-go.techidaily.com/pokemon-go-error-12-failed-to-detect-location-on-nokia-c12-plus-drfone-by-drfone-virtual-android/
- License: This work is licensed under CC BY-NC-SA 4.0.