
4 solution to get rid of pokemon fail to detect location On OnePlus Nord N30 SE | Dr.fone
4 solution to get rid of pokemon fail to detect location On OnePlus Nord N30 SE
Pokémon go failed to detect location is an error that is frequently faced by the players and there are several reasons for it. From device to server-based all the reasons amount to the error and therefore the right solution must be applied to get the work done with ease and perfection. The location-based attribute of the game is something that has been one of the best features. It is the sole reason for which the game is not only popular but also one of the most downloaded games of all time. It is therefore important to overcome fail to detect location error in this game.
Part 1: Why does Pokémon fail to detect location?
The two main and frequent errors that are related to the Pokémon are error 11 and error 12. These not only frustrate the users but also hamper the game experience. Failed to detect location Pokémon go is the result. This part of the article will make sure that you get all the information that is needed to overcome the issue. The GPS joystick failed to detect location error will also be overcome and you will also be able to guide others.
Causes of Error 11
- If the game failed to detect location Pokémon go fake GPS then the most common reason is the fact that the GPS has been disabled. The internet and GPS are the two important aspects of this game. If anyone is not available then it is a must that the game will not work at all.
- Once the game has been installed it requires certain permissions that should be granted for proper working. All the permissions must be accepted for the game to work fine. If the GPS access has not been granted then it should be so that the GPS joystick Pokémon go failed to detect location error is resolved and you can enjoy the game.
- To install some applications and to enhance the features of the phone it is at times rooted in the case of android or jailbroken in the case of iPhone. In both cases, you will get the Pokémon to go failed to detect location fake GPS error. It is therefore important that the issue is resolved by getting the OnePlus Nord N30 SE device back to its original shape. It can be done by unrooting the OnePlus Nord N30 SE devices so that the issue is resolved.

Causes of Error 12
- The Mock location on the OnePlus Nord N30 SE device is enabled can lead to failed to detect location GPS joystick or error 12 on the OnePlus Nord N30 SE device. It is therefore advised to make sure that the location in question is disabled to get the gaming experience back on track.
- The other and the most common reason for the error 12 is the fact that the GPS signals are not received by the OnePlus Nord N30 SE device. It also leads to Pokémon failed to detect location error and will make sure that you get all the enjoyment for which the game has been downloaded.
Part 2: 3 solutions to fix Pokémon fails to detect the location

Solution 1: Turn on GPS
This is the most common method that can be applied to make sure that the game works perfectly.
i. Drag the notification panel down on your device.
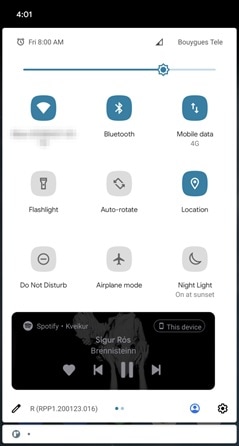
ii. Click on the location to turn it ON.

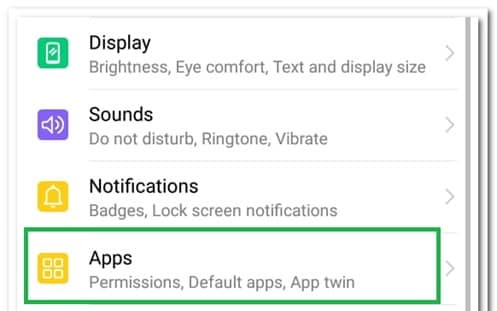
Solution 2: Setting Permissions for the application
If the right permissions are not given to the application then it can also lead to the fake GPS failed to detect location. To make sure that this is overcome you need to follow the steps as under.
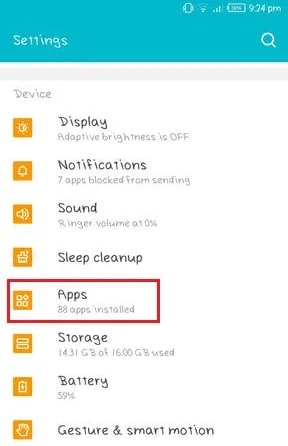
i. Go to Settings > Applications > Apps to access the permissions for the application.
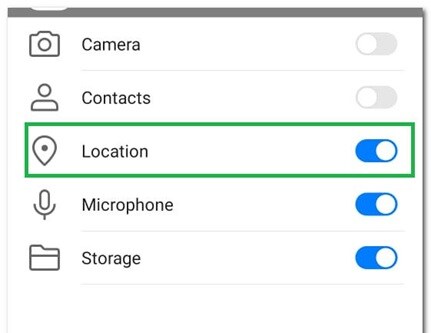
ii. Go to Pokémon Go > Permissions > Turn on location to get the issue resolved.
Solution 3: Clear Cache
i. Go to the Settings of your device
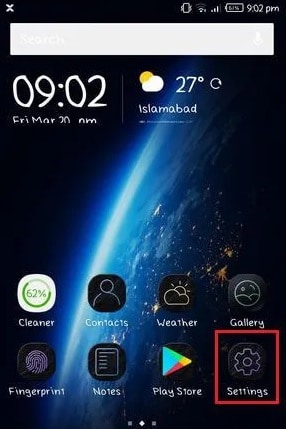
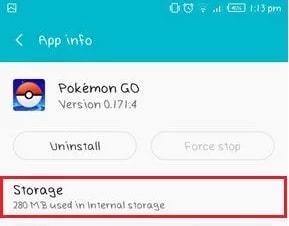
ii. Click on the app’s icon on the next screen
iii. Click on the storage option.

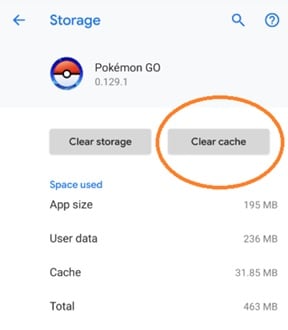
iv. Clear data and cache and restart the OnePlus Nord N30 SE device to get the issue fixed.
Part 3: Dr.Fone Virtual location change your location in one click
To fix the fake GPS Pokémon go failed to detect location Dr. Fone’s virtual location is the best and the state of the art program that can be used. It is not only the best but also allows the users to overcome the issues that are presented by the other similar programs. With this program, it is easy to make sure that the overall game performance improves in terms of location detection. You can teleport with ease using this program. With an intuitive interface and a professional team backing the program, you get the ultimate results. Not only Pokémon but all the location-based and AR games this program is a boon.
How to use Dr. Fone Virtual Location
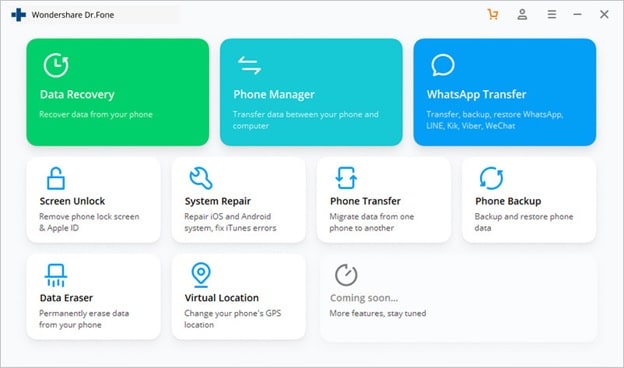
Step 1: Program Installation
First of all download and install the program to get started.
 Screensaver Factory, Create stunning professional screensavers within minutes. Create screensavers for yourself, for marketing or unlimited royalty-free commercial distribution. Make screensavers from images, video and swf flash, add background music and smooth sprite and transition effects. Screensaver Factory is very easy to use, and it enables you to make self-installing screensaver files and CDs for easy setup and distribution. Screensaver Factory is the most advanced software of its kind.
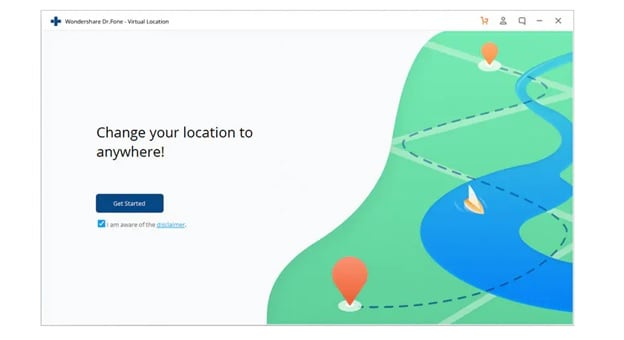
Step 2: Enable Virtual Location
Click the get started icon once the iPhone has been connected to the system and the virtual location has been enabled.

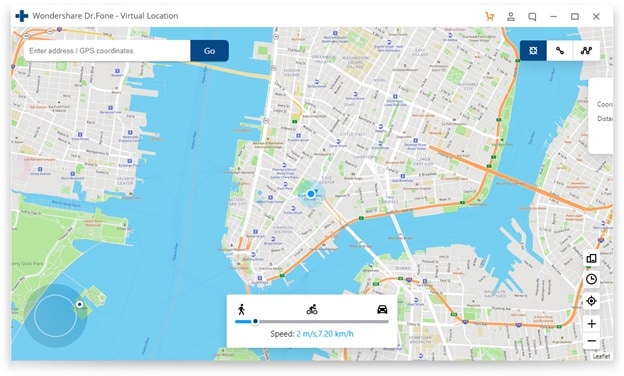
Step 3: Locate the OnePlus Nord N30 SE device
Click the center on a button to make sure that your location is detected by the program.


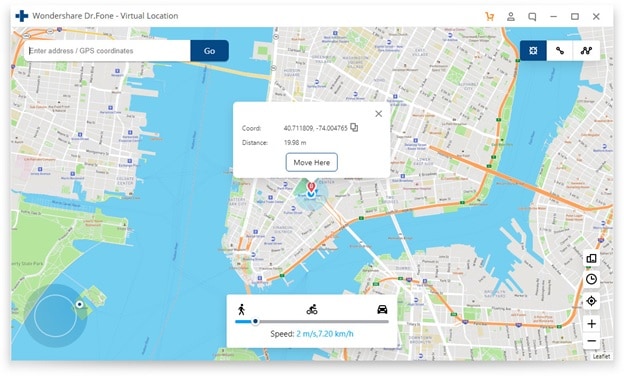
Step 4: Change Location
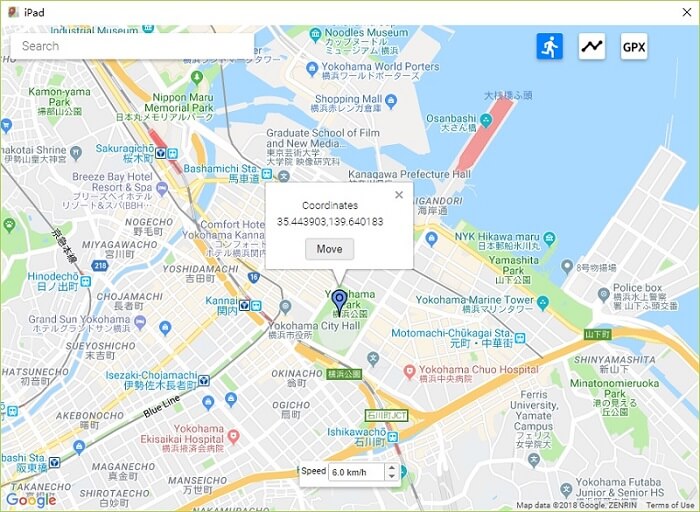
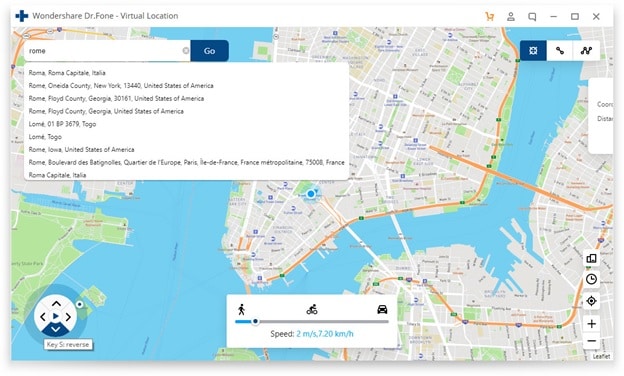
The third icon on the upper right corner is to be pressed to teleport. In the bar type the name of the location you want to teleport to.


Step 5: Move to a teleported location
Click on move here to get to the location that has been selected.

Step 6: Validation
Your iPhone will show the same location as on the program and this finishes the process.
 vMix Basic HD - Software based live production. vMix Basic HD includes 4 inputs, 3 cameras, streaming, recording, playlist.
Conclusion
Dr. Fone’s virtual location is the best and the most advanced program that will make sure that you get the best results. It will not only enhance your gaming experience but will also remove the Pokémon go GPS joystick that failed to detect location error with perfection. It is the best program that is easy to use and there are guides online that further foster the process. With this program, it is easy to get a step ahead for all AR and location-based games and to enjoy to your fullest.
The Best iSpoofer Alternative to Try On OnePlus Nord N30 SE
“Is iSpoofer for Pokemon Go not working anymore? Can someone tell me how to spoof my iPhone X location now when the iSpoofer tool is shut down?”
If you have been using iSpoofer for a while to change your iPhone location, you can encounter a similar situation. Since iSpoofer is no longer available, users are actively looking for its alternative. In this post, I will let you know the iSpoofer use and why we can’t take its assistance to change the Pokemon Go location anymore. I will also make you familiar with the best iSpoofer alternative for iPhone and Android.

Part 1: Why did iSpoofer shutdown?
Earlier, iSpoofer used to be one of the most popular apps to change our location on Pokemon Go. Sadly, the application is no longer working and you can’t even do iSpoofer download from its website.
Why did iSpoofer shutdown?
- The use of iSpoofer for Pokemon Go is against the terms of the game (as it doesn’t allow the use of third-party apps).
- Recently, Niantic caught many people using iSpoofer for Pokemon Go and this got their accounts banned.
- Since the iSpoofer use is no longer applicable, the company has shut down the product’s availability.
- Even if you have already done the iSpoofer download, the application will not be supported by Pokemon Go and its use will get your account terminated.

Will iSpoofer work again?
Most likely, the chances of iSpoofer working again are pretty bleak. This is because Pokemon Go users were the major target customers of the product. Since Niantic has blocklisted iSpoofer a while back, Pokemon Go players can no longer use it. Therefore, it is better to look for a reliable iSpoofer alternative instead.
Part 2: The Best iSpoofer Alternative to Change your iPhone Location
If you are looking for an iSpoofer alternative to spoof your phone location, consider picking Dr.Fone – Virtual Location (iOS & Android) . The application is extremely easy to use and can instantly change your device location. Here are some of the reasons why Dr.Fone – Virtual Location (iOS & Android) is the best iSpoofer alternative:
- Compared to iSpoofer, using Dr.Fone – Virtual Location is extremely easy and it will not need jailbreak access as well.
- Since it is a 100% secure way to spoof your iPhone location, your Pokemon Go account won’t be compromised in the process.
- You can spoof your device location to anywhere you want by entering the place’s address or coordinates using the application.
- There is also a provision to simulate the OnePlus Nord N30 SE device’s movement between multiple spots at any speed of your choice.
- The interface will also display a GPS joystick that you can use to move realistically on the map.
You can follow these simple steps to use this iSpoofer alternative to change your iPhone location easily.
Step 1: Connect your iPhone to the system
To begin with, you can connect your iPhone to the system and launch the Dr.Fone – Virtual Location on it. Now, agree to its terms and click on the “Get Started” button.
Step 2: Enter the target location
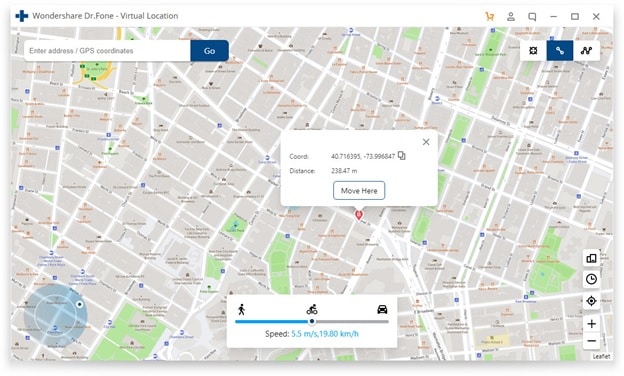
Once your iPhone is detected, the interface will display its present location. You can now click on the teleport mode icon from the top.
Now, please enter the address or the coordinates of the target location and load it on the map.
Step 3: Spoof your iPhone location
As you would select the target location, the application will automatically change the interface. You can now drag the pin around and even zoom in/out the map to select the target location. Lastly, you can select the “Move Here” button and the location of your iPhone would be changed automatically.
You can now launch Pokemon Go or any other GPS-based app to check the spoofed location of your iPhone.

Note: Keep in mind the cooldown duration before changing your location to ensure your account won’t get banned by Niantic while using the location spoofer. For instance, wait for a few minutes and only change your location realistically.
 Video Converter Factory Pro
Part 3: How to Spoof your OnePlus Nord N30 SE Device’s Location for Pokemon Go?
Unlike iOS devices, it is pretty easy to spoof location in Android devices. This is because Google allows us to mock the location of our device using any reliable mobile app (unlike Apple). Therefore, if you are looking for an iSpoofer alternative for Android devices, you can follow these basic instructions.
Step 1: Enable the Mock Location feature
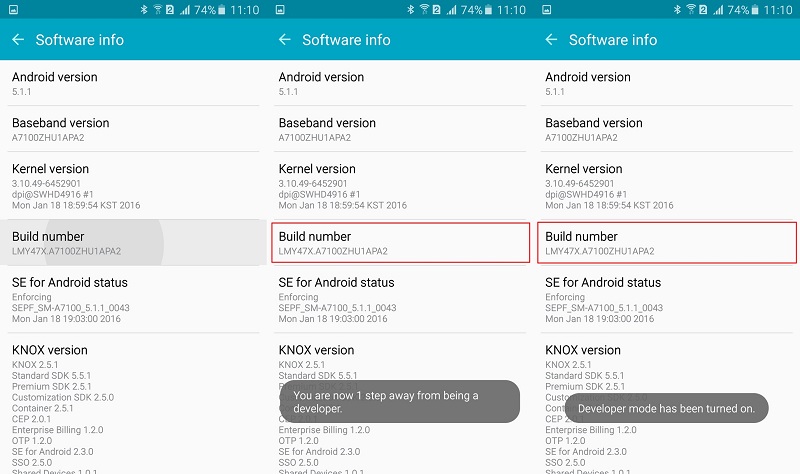
At first, you need to turn on the Developer Options to enable the Mock Location feature. For this, go to your phone’s Settings > About Phone and tap the “Build Number” seven times to turn on Developer Options.
 Glary Utilities PRO - Premium all-in-one utility to clean, speed up, maintain and protect your PC
Great! Now you can go to your phone’s Settings > Developer Options and turn on the Mock Location option.
Step 2: Install a Mock Location App
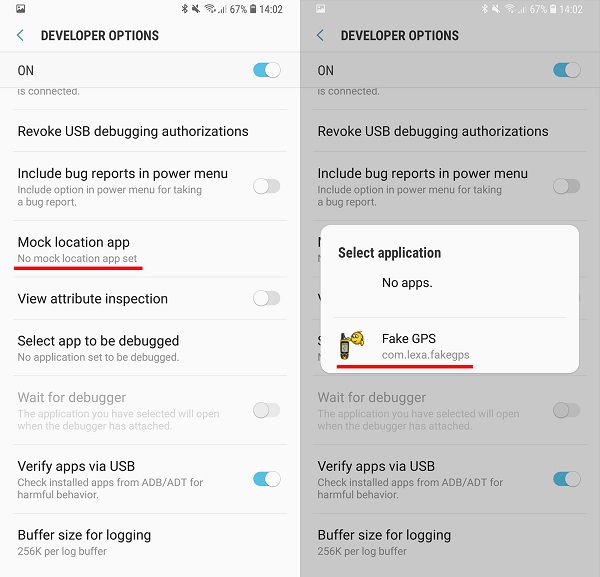
Afterward, you can go to the Play Store and install any reliable mock location app from developers like Hola or Lexa. Let’s suppose we have installed the Mock GPS app by Lexa on the OnePlus Nord N30 SE device.

Once the app has been downloaded, you can again go to your phone’s Settings > Developer Options and set the app as a default tool to spoof your location.
Step 3: Change your device’s location
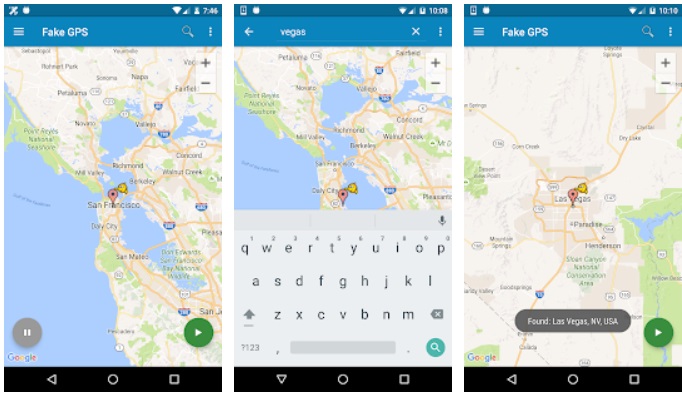
That’s it! Now you can launch the mock location app and enter the address or coordinates of any target location. You can further adjust the pin and drop it anywhere you like to spoof the OnePlus Nord N30 SE device’s location.
There you go! After reading this post, I’m sure that you would be able to know about the iSpoofer use for Pokemon Go. Since iSpoofer has been shut down, you can no longer use it to change your iPhone location. Therefore, you can consider Dr.Fone - Virtual Location (iOS & Android) as an ideal iSpoofer alternative for your device. In just a few clicks, you can change the location of your iPhone anywhere you like and that too without jailbreaking your phone.
All You Need To Know About Mega Greninja For OnePlus Nord N30 SE
Are you a fan of Pokemon Go? Then, you will find this article not only useful but also quite interesting. In case you have never played this game before, then you should know that Pokemon Go is a fantastic augmented reality game.
It requires the use of GPS (Global Positioning System) to track your location. Basically, Pokemon Go is a mobile application which you can easily download from Google Play Store or App Store, and it’s absolutely free. In simple words, you can say that Pokemon Go makes use of mapping technology so as to plot your actual location as you roam around in the streets to catch your favourite Pokemon.
When you play the game, your main goal would be to catch as many Pokemon or fictional characters as you can. Your main task will be to battle your opponents to catch the Pokemon and then train them.
It’s worth mentioning here that this AR-game is absolutely convenient to play. Now, one of the most amazing features that have been added to this game is Mega Evolution. But, unfortunately if you were of the opinion that greninja can mega evolve, then you are completely wrong, in fact you should note that no Kalos pokemon can mega evolve.
Through this article, we will discuss all you need to know about Greninja. So, without any further delay, let’s get started.
Part 1: Who is Mega greninja?
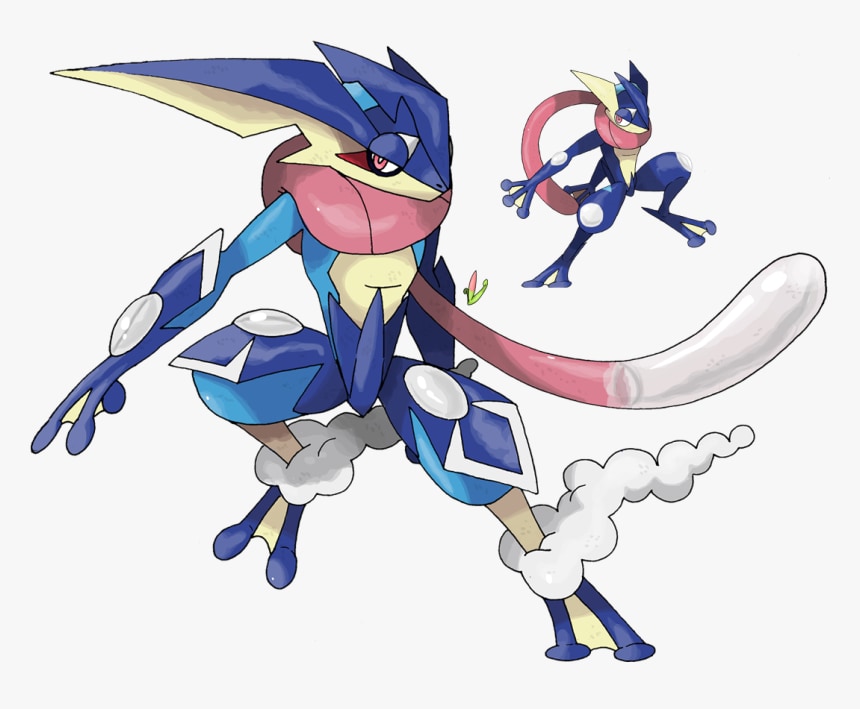
Also, called the Ninja Pokemon, Greninja is Dark/ Water-type pokemon. Some people love to call it a frog-like master. One of the most amazing features of Greninja pokemon is that with its swift movements, you will notice that this pokemon succeeds in confusing its opponents.
It makes use of very sharp throwing stars to slice its enemies. It features Torrent ability.
There are various weaknesses of this pokemon which include “Fighting”, “Grass”, “Electric”, “Bug”, and “Fairy”.Its worth mentioning here that Greninja pokemon is the final evolution of Froakie.
 Glarysoft File Recovery Pro - Helps to recover your lost file/data, even permanently deleted data.
Part 2: What are the Strengths of Greninja in Pokemon?


Greninja is resistant to “Water”, “Fire”, “Ice”, “Dark”, “Steel” and finally “Ghost”. Also, this pokemon is immune to “Psychic”. This pokemon’s presence can be very intimidating for its opponents, it would not be wrong if we say that Greninja is quite unpredictable. There is no doubt that the counter attacks of Greniaja prove to be very dangerous for its enemies.
Part 3: How to Catch Greninja?

In order to catch Greninja, you will be required to fulfill specific requirements in the Pokemon Sun and Moon Exclusive demo.
First of all, after launching the Pokemon Sun and Moon Demo, go to the Pokemon Center.
Then, you’ll meet Professor Kukui and when he starts talking to you and asks what you wish to do , choose the option of “bring to full version.After that, you will be required to choose Ash-Greninja. Then, open the full game, finally you have to enter the nearest Pokémon Center.
Catching your favourite Pokemon or to mega evolve a specific pokemon will require you to go to different places or explore different locations, but it’s not always possible to step out of your house, it might be raining, or its night time, in the case, we recommend using software called Dr.Fone(Virtual Location).
With the help of this amazing software, you can teleport to any location or place in the whole without even requiring you to step out of your house.
In order to get started with Dr.Fone, you need to download Dr.Fone(Virtual Location) iOS. Then, you have to install Dr.fone on your smartphone. Finally, you have to launch Dr.Fone (Virtual Location) on your device.
Step 1: You have to tap on “Virtual Location” among the various options that you will notice therein. It’s important to ensure that when you are setting up Dr.Fone on your device, always ensure that your iPhone is connected to the PC. Then, click on “Get Started”.
Step 2: If you have executed the prior steps or directions successfully, then you will see a new window that shows your actual location on a map will get displayed on your screen. Now, make sure that your displayed location on moa is accurate, if not, then click on “Center On,” with the help of this, you’ll be able to make your location correct.
Step 3: After all the previous steps, the next step is to click on the “teleport mode” icon, which will be located in the upper-right part. This will activate the teleport mode. After that, you have to enter the name of the location or place where you wish to teleport to in the upper left field. Finally, tap on “Go”. As an example, we are going to enter “Italy”, Rome in the left field.
Step 4: In this manner, your location will now be understood or set by the system to “Italy”. You’ll see a pop-up box; you have to just click on “Move On”.
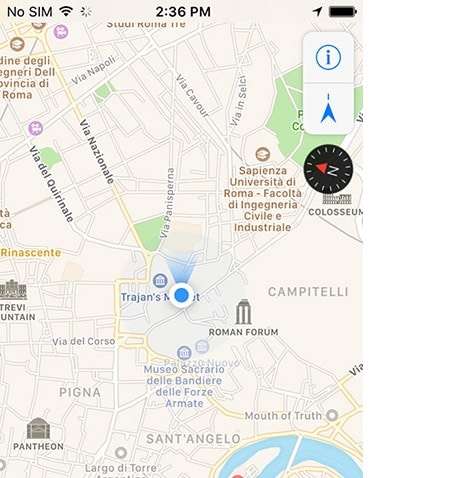
Step 5: If you have followed the directions accurately, your actual location on the map will now be set to “Italy”. You can confirm your location from the Pokemon Go’s map. Finally, below we have provided a screenshot of how the location will be shown.

Step 6: Also, you’ll see that the location on your iPhone would have also changed now to “Italy” or any other place that you have entered earlier.
 NeoDownloader - Fast and fully automatic image/video/music downloader.
Conclusion
So, we have reached the end of this article. We hope that you found the article quite useful as well as insightful. We also hope that with the help of the setup guide for Dr.Fone you can now easily catch your favourite pokemon by teleporting to different locations across the world. If you have any doubts or suggestions related to this article, then feel free to write it down in the comment section. So, this was all from our side for now. Stay Tuned
- Title: 4 solution to get rid of pokemon fail to detect location On OnePlus Nord N30 SE | Dr.fone
- Author: Lary
- Created at : 2024-07-23 02:02:21
- Updated at : 2024-07-24 02:02:21
- Link: https://android-pokemon-go.techidaily.com/4-solution-to-get-rid-of-pokemon-fail-to-detect-location-on-oneplus-nord-n30-se-drfone-by-drfone-virtual-android/
- License: This work is licensed under CC BY-NC-SA 4.0.